The jig is out

I’m using L-girder benchwork, with fairly large areas of flat ground (since most everything prototypically should be around 15 feet above sea level, if that).   This would normally entail risers with cleats on them, so I can drive all of the screws from below.   The main reason to use L-girder benchwork is the ability to move risers & joists as needed, and that is hard to do if you drive screws in from the top.

I dislike using cleats on the risers — it’s not that hard but it can be kind of fiddly.

I also have the luck of being able to use most of my joists as the riser as well, since most of the lumber I used to make the joists was cut at the same time so they’re the same height.

IMG_0502

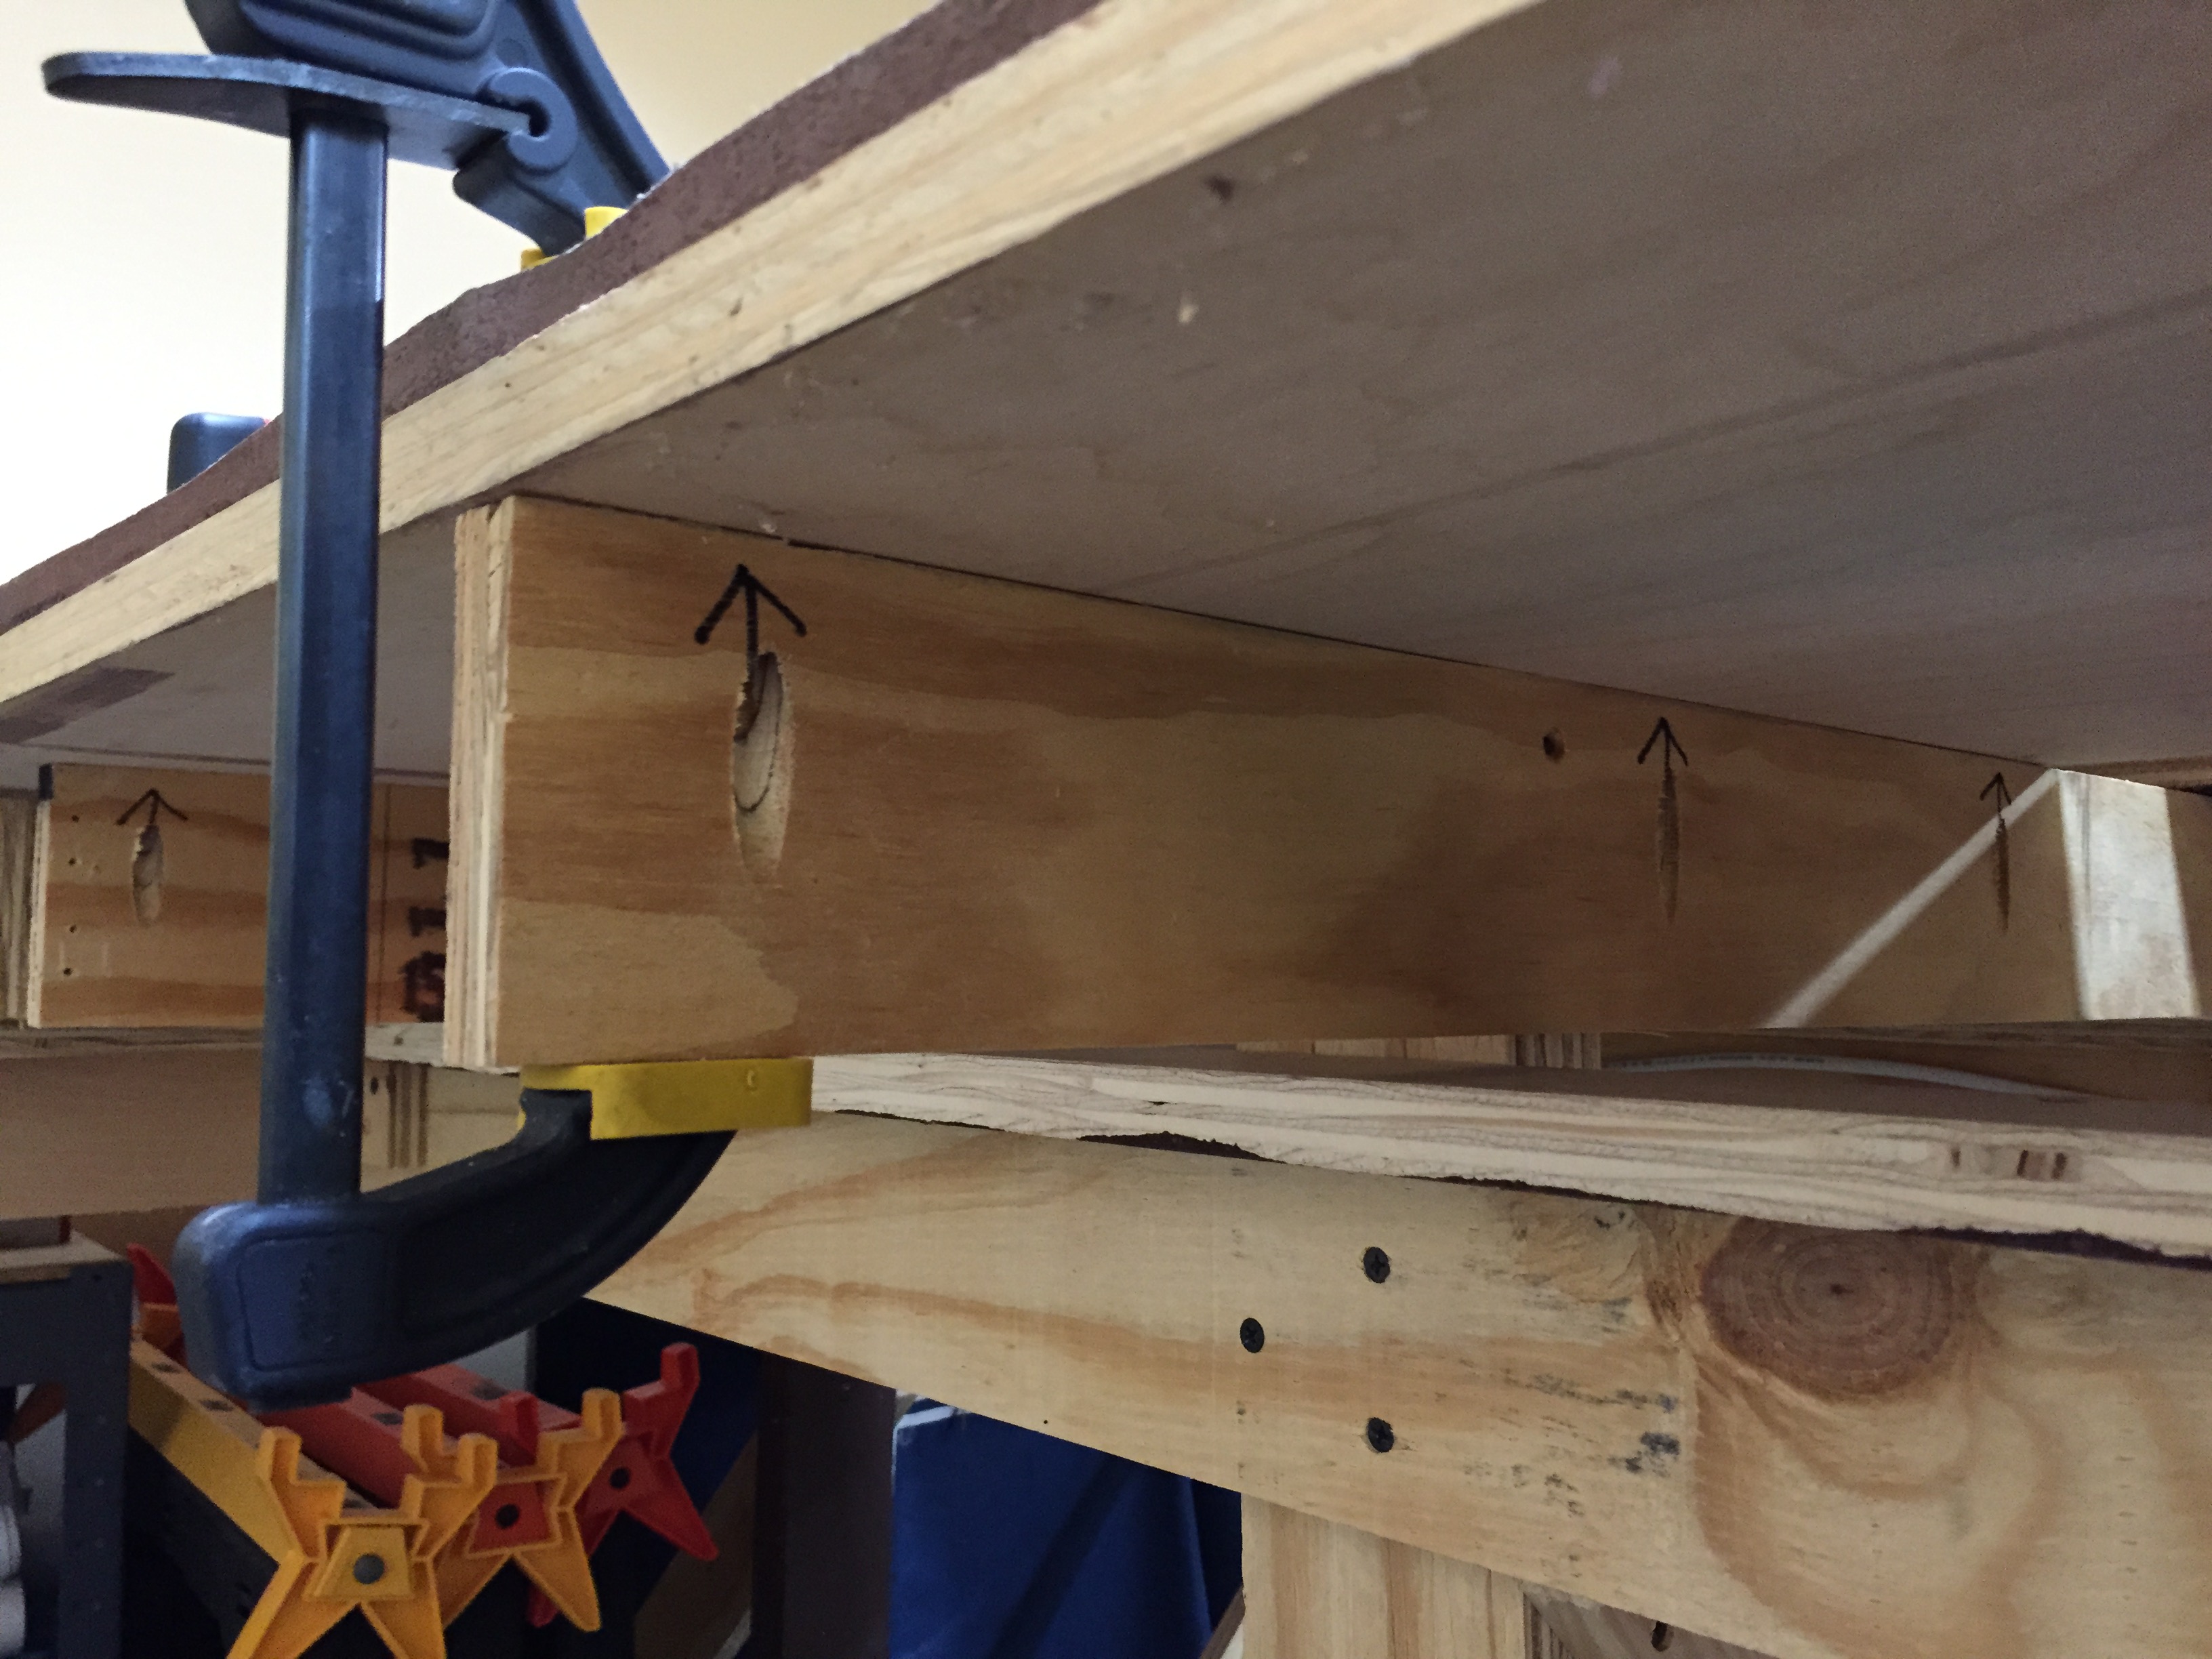
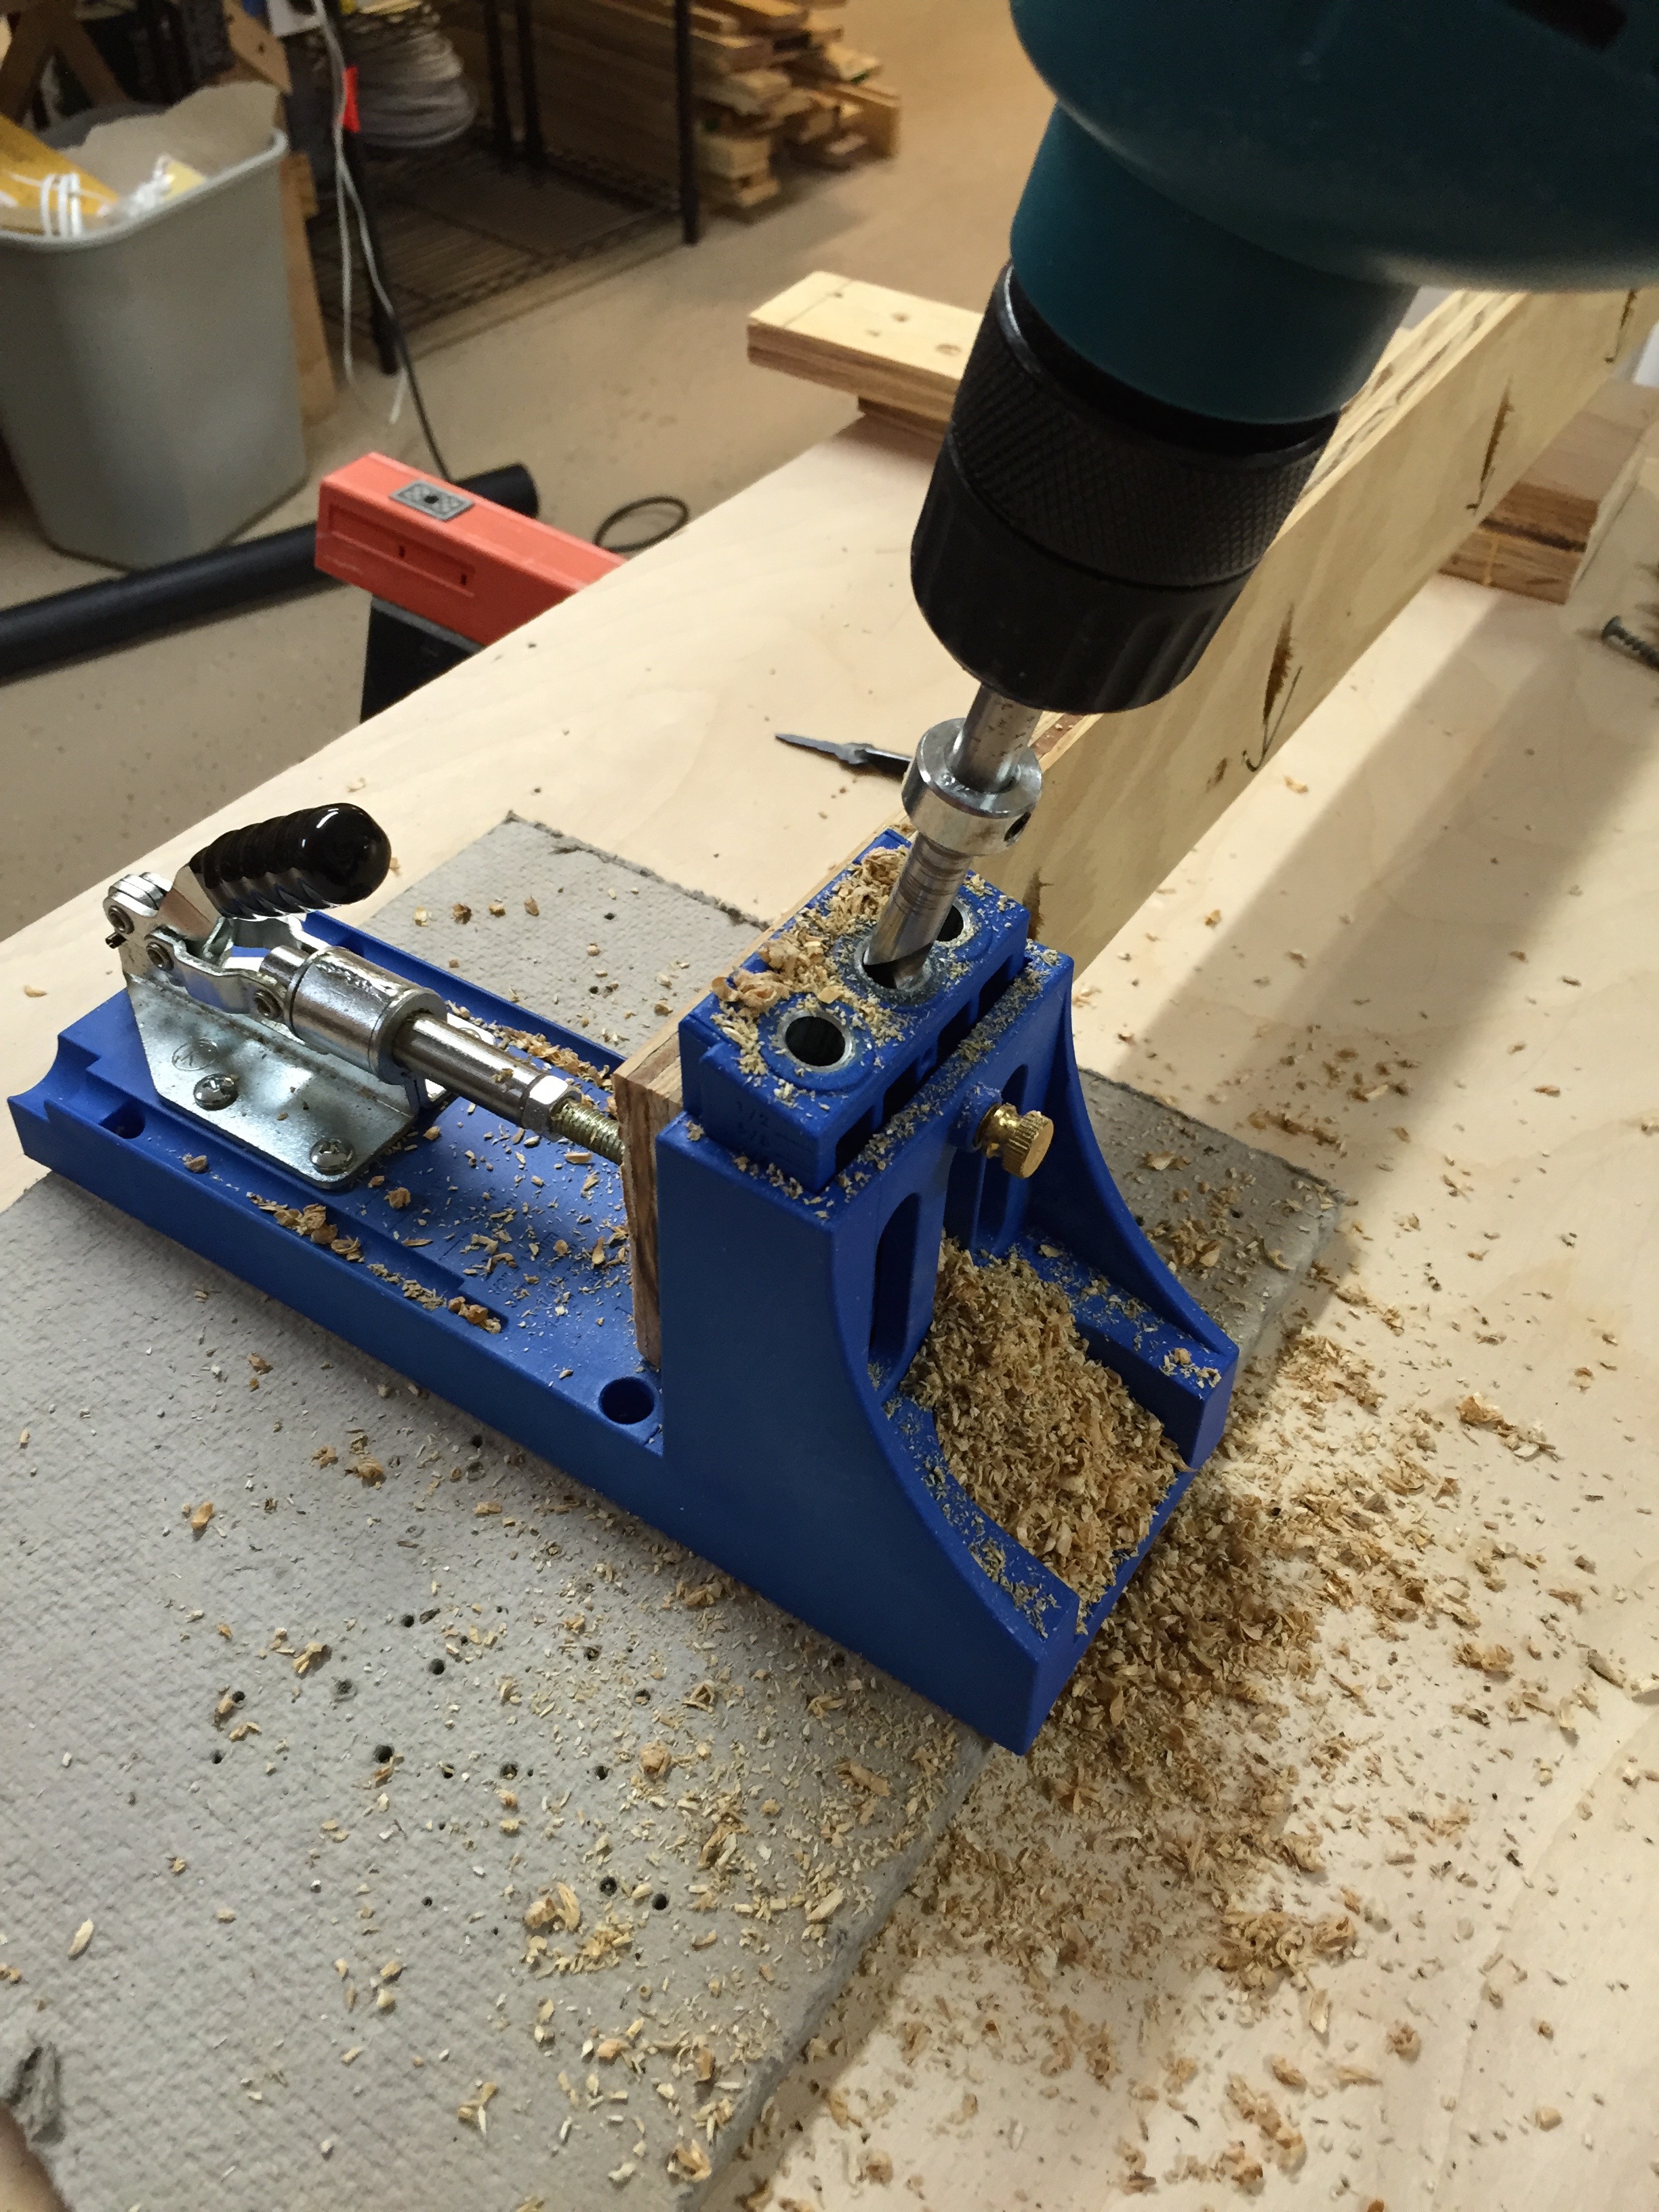
Time to dig out the tools.  I have a jig to make these nifty pocket holes, and they work beautifully for driving the screws from below.   This joist is a bit smaller than most, so it’s attached to the leg and not the L-girder.

The jig holds the board securely and has a guide for a special bit.  Everything is set “just right” for the pocket hole to be drilled and a pilot for the screw placement.  A bit of sawdust is created, and you’re ready to drive the screw and hold the joist to the plywood.

IMG_0500


I placed several pockets to attach to the boards above.  No part of the screw protrudes above the surface of the plywood when they’re driven.

IMG_0501


I think they’ll all be out of the way as I need to drill switch throw holes in order to place the switch motors, but if not, I’ll just move the joist.  That is the beauty of the whole L-girder system after all.

The jig is from Kreg and can be ordered online or from your favorite local hardware store.


These are some of my favorite things

I have several of each of these, and I use them much more often that I would have expected.

They’re simple weights.   Cut with nice square corners, so they’re more than just a thing to hold something else down.  I can use them to square up corners when I’m gluing them.  They’re used to brace things against.   They’ll hold the other end of track down as I spike it.  They hold wires on the top side as I work with them belowdecks.IMG_5410

I bought some brass bar stock many years ago (about 1″x2″ x 5 feet or so), and had a friend cut off several pieces about 6″-8″ long.   I still have one piece about 2′ long – not something I want to drop on my toes.

The larger one shown is a steel block, of which I purchased 3 or 4 at some modeler’s garage sale (alas, I don’t recall whose).

These aren’t precisely measured machinist’s blocks — the dimensions aren’t any nice even size.  I don’t know they’re weight, but I do know the brass one are NOT sized to anything other than “this looks good”.

They’re both heavy, as a weight should be.  I’d guess the steel weight at 5-8 pounds, the brass ones at 3-4 lbs. maybe.

Oh My Aching….

Michael: I guarantee these are not what you first thought of.

IMG_5411

When working on benchwork, or underlayout wiring, or schlepping things around, I find myself kneeling a lot.  And my knees ain’t what they used to be.   A $3 pair of foam knee pads is the best investment I can think of for making a model railroad.

Oh, they’re not perfect.  The elastic strap might be a bit too tight for all-day use.  They do sometimes slip down.  These are solvable, especially if you’re willing to part with a little more $$$ and buy some of the flexible armor that a Knight of the Round Table would have been happy to have back in the day.   But for $3, these foam pads work well for as often as I need them.

My first pair was purchased before the Saint Paul Bridge & Terminal was built.  I recently was wondering why my knees hurt so much, even when I was using them.  Well, foam wears out with use.  Duh!  No kidding.  14 years on one pair isn’t bad — probably should have been 13 1/2, but I’ll survive.

Sine qua non.

I wouldn’t even begin to build  new railroad without these.