
I’ve added a track plan to the Layout at a Glance page, so now you can have some notion of what I’m talking about.
Why I build this stuff….
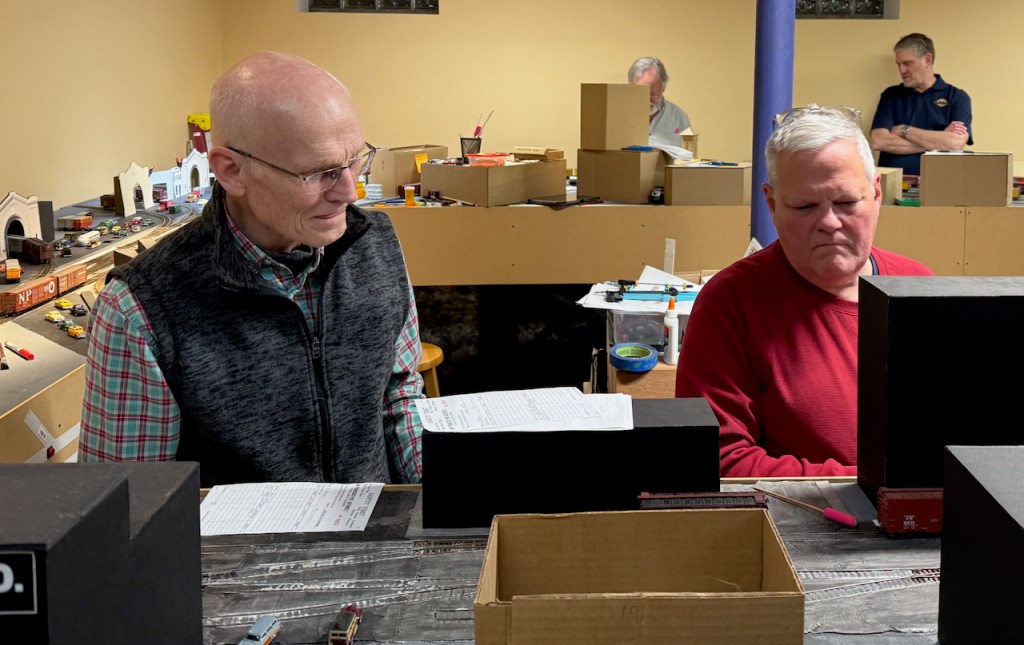
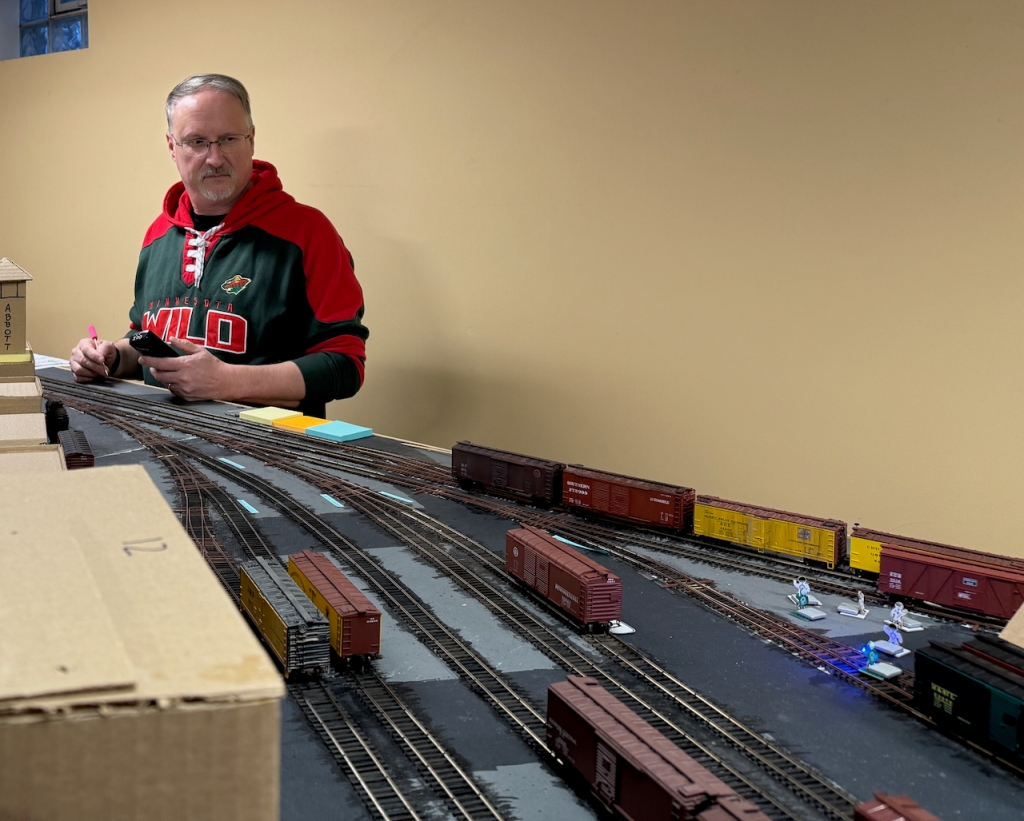
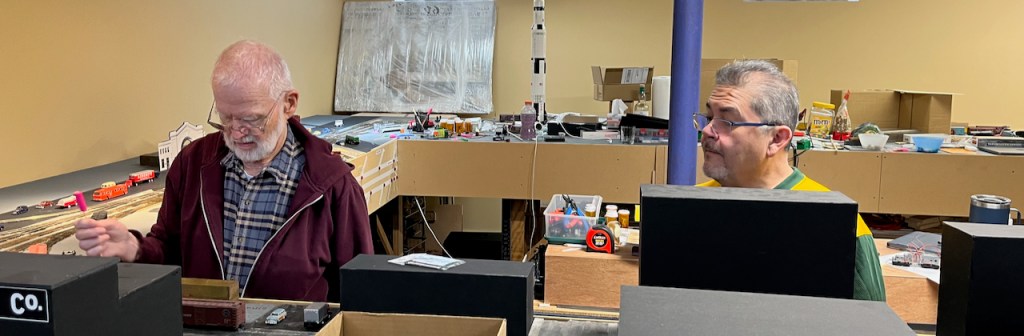
Some people build their model railroads for the sake of the modeling. Not me. I build this railroad so that it can be operated, and I’m willing to forgo certain things (such as highly detailed scenery) for the sake of getting crews running on the line and moving traffic.
The Twin Cities hosted another invitational operating event (ProRail) just this past weekend, and I ran a couple of sessions for the out-of-town visitors. I also ran three session for locals earlier this month (in 22 days I ran 5 op sessions and an open house for the Twin Cities Division).
The hurdle to getting an op session going right now is managing the paperwork. The eventual goal is to have an agent position that writes up the B-7s for the switch crews, but until then I have to write them up ahead of time. That’s a fair bit of work, and I don’t want to have to do it for each of the session. So I cheat. I recorded the starting position of every car on the railroad, and restaging is really just putting everything back to where it was at the beginning of the session. Every crew gets the same paperwork, in the same order.
No two crews have run things exactly the same way, even with this level playing field of identical starting positions. And that’s perfectly fine — I don’t think there’s a single right way to do things. There are some wrong things to do, but the system is forgiving and will work itself out if the crew does something really unusual.
Since there’s really no “finish line” (unless everyone gets through all of the paperwork I’ve prepared, which has never happened), crews just run until we’re ready to be done. Right now that seems to be around 2 1/2 hours of operating, although several of the ProRail operators said they’d have happily kept going for another couple of hours.
I do need to balance out the traffic better. The Produce Yard crews had less to do than the North District crews, with more “overhead” traffic than take-outs and spot-at’s. I’ve got some ideas for making the “Produce Yard” more specific, so that spotting cars there will be a bit more “sure-spot” like. And the additional industries that will be served by the same crew, south of Market Street, will help even out the work.


The Fall Campaign (part 2)
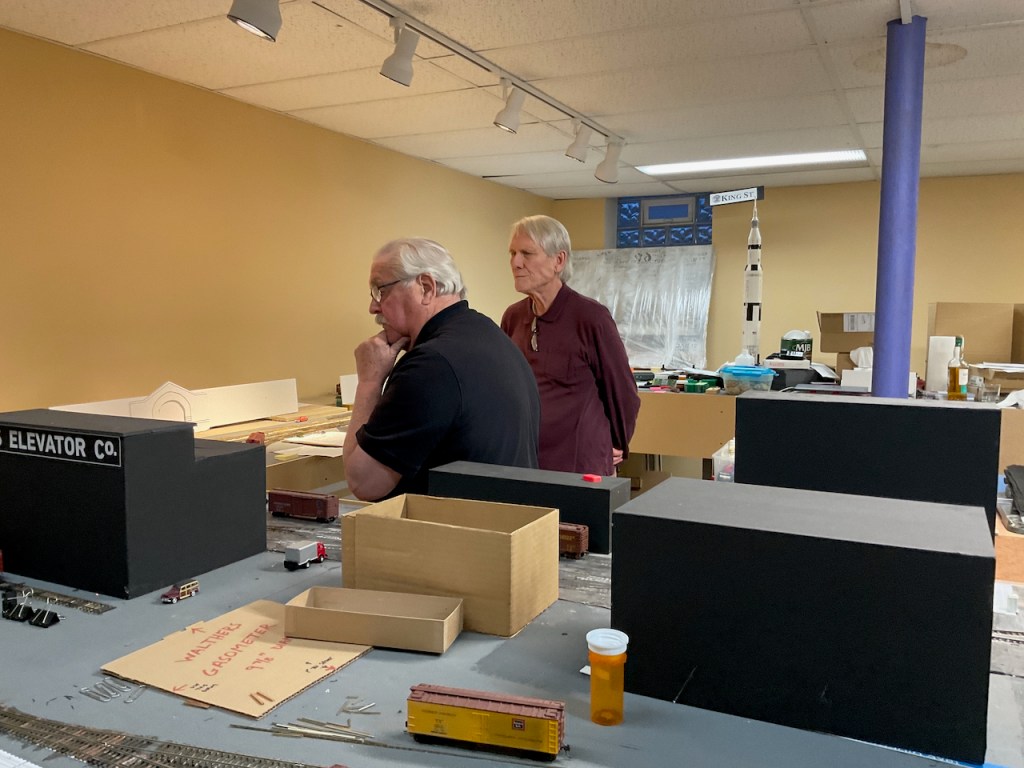
So much has been done in the last several months. From bare benchwork to an operating switching district, this portion of the layout has been the focus of my modeling time for a while now, and it’s coming to a good place.
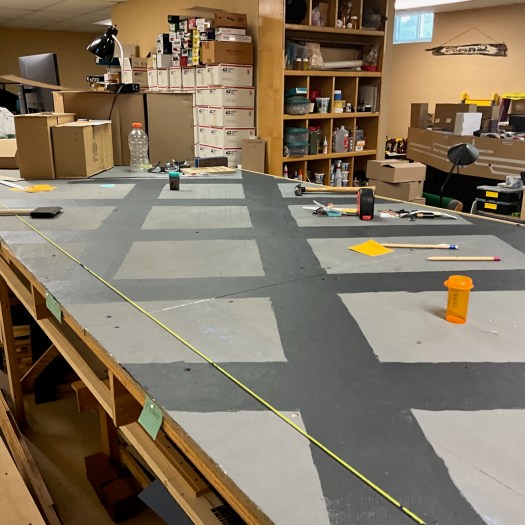
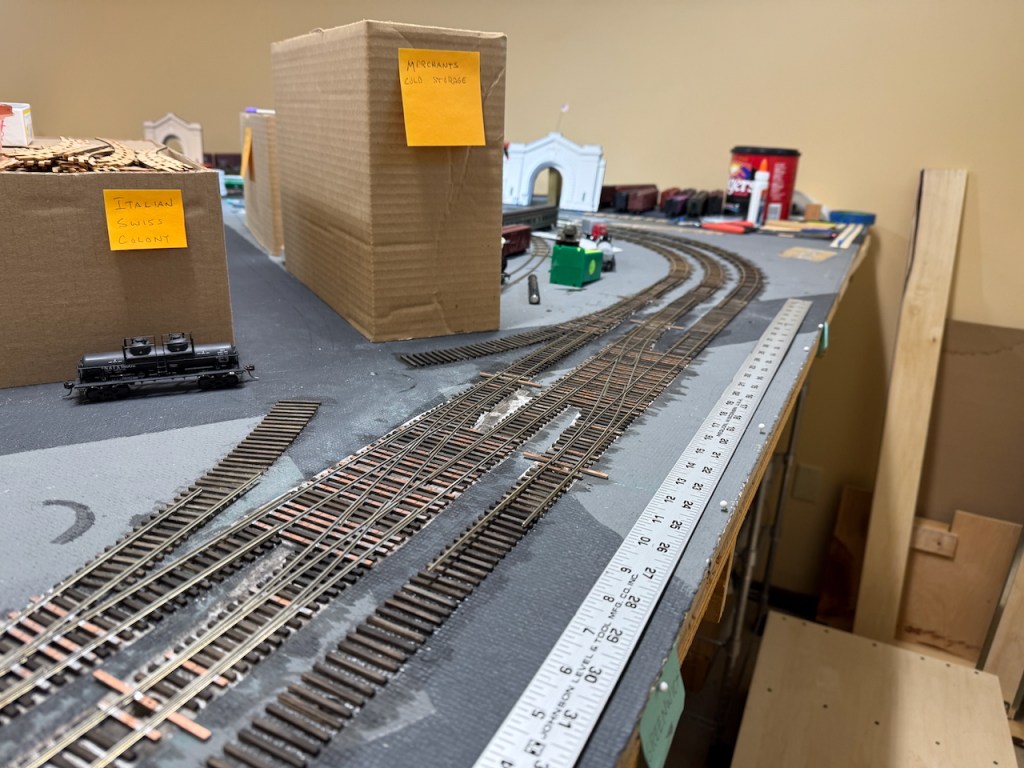
A street grid has been laid out. The front edge of the benchwork along the aisle is The Embarcadero, and the streets running away from the camera are Drumm and Front, ranging from Pacific to Greenwich. All more or less just to the east of and below Telegraph Hill.

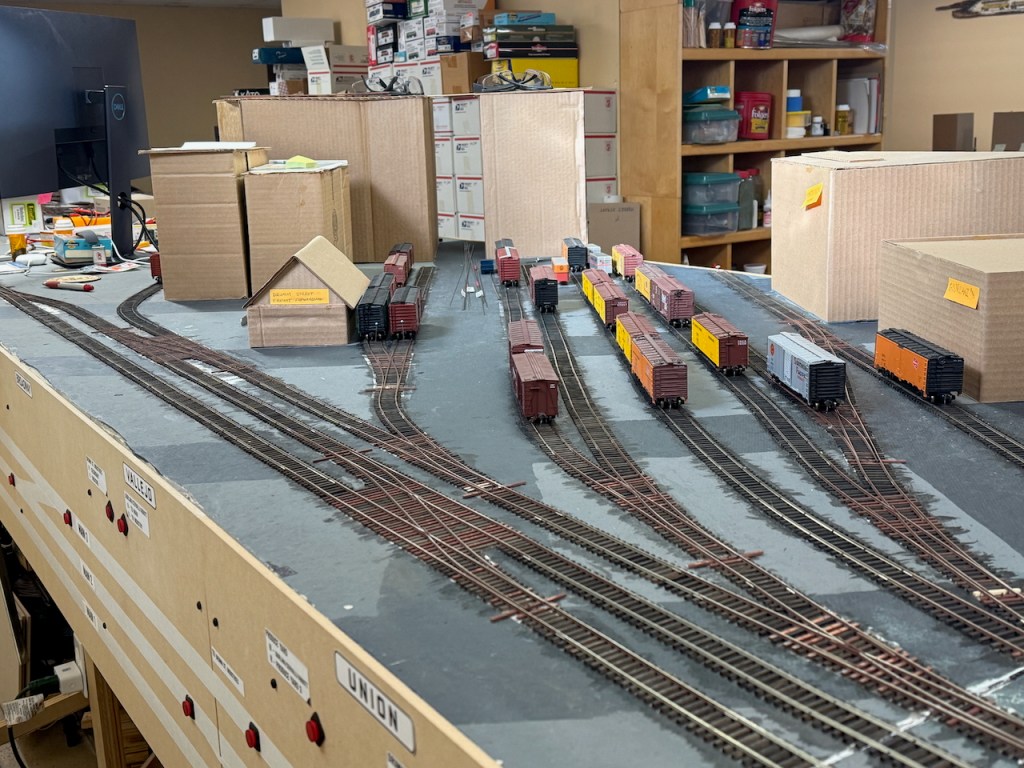
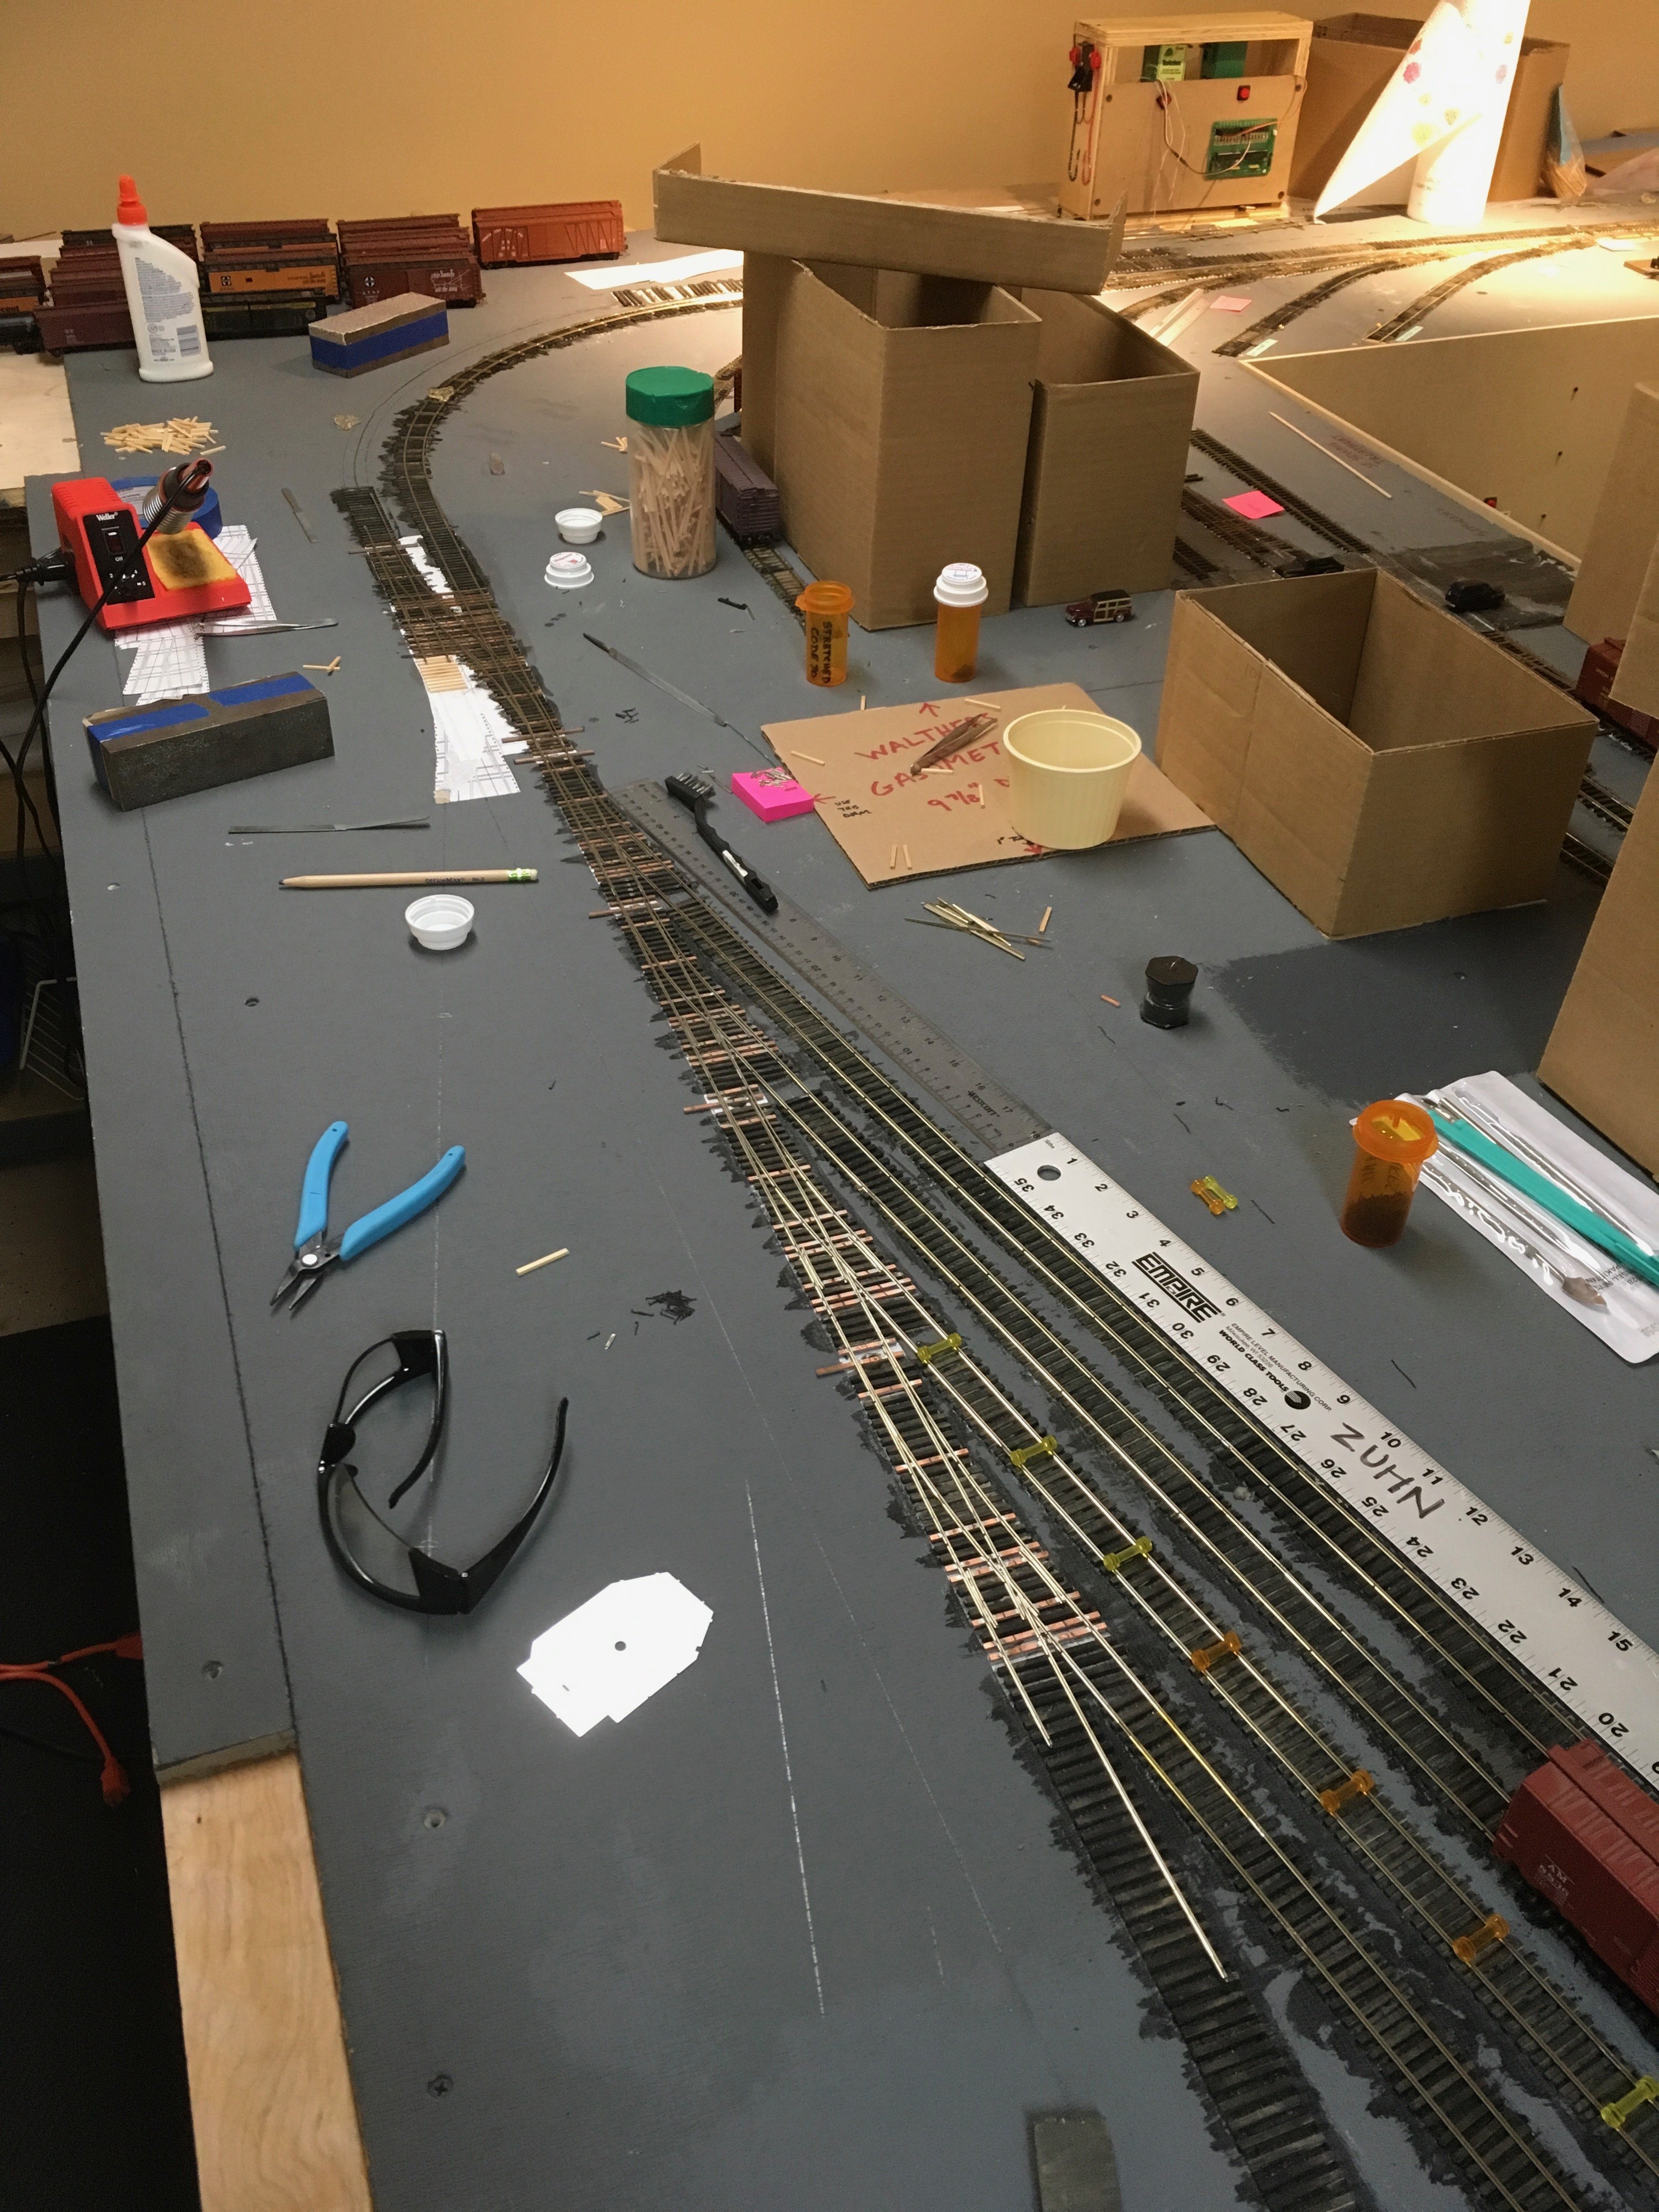
This panoramic shot shows all of the ties laid down, now that I’ve got that underlying painted street grid. Switch templates are glued down to the homasote, then ties glued atop that template, and then long strips of ties connecting them all. These long tracks extending several blocks back are definitely the longest stretches of “straight track” on the whole railroad.
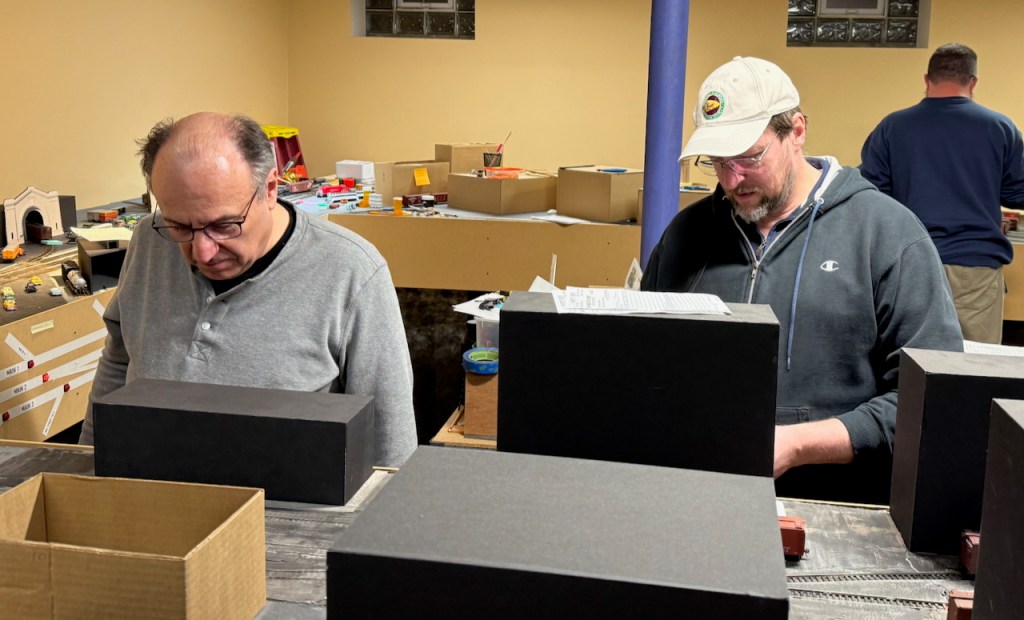
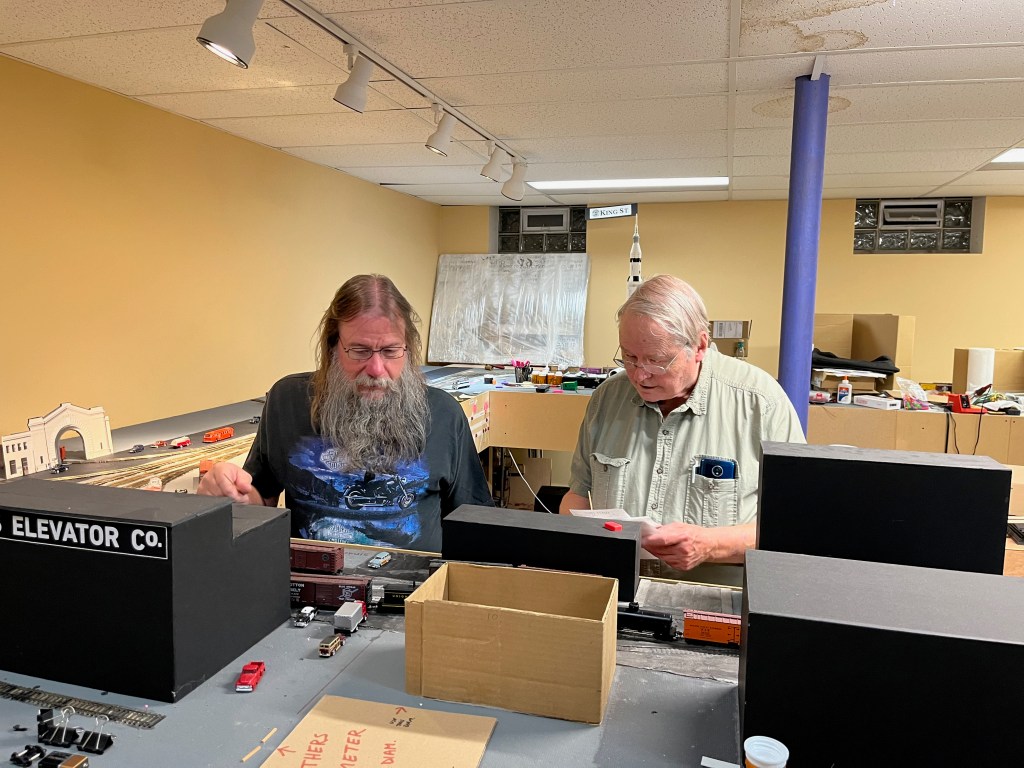
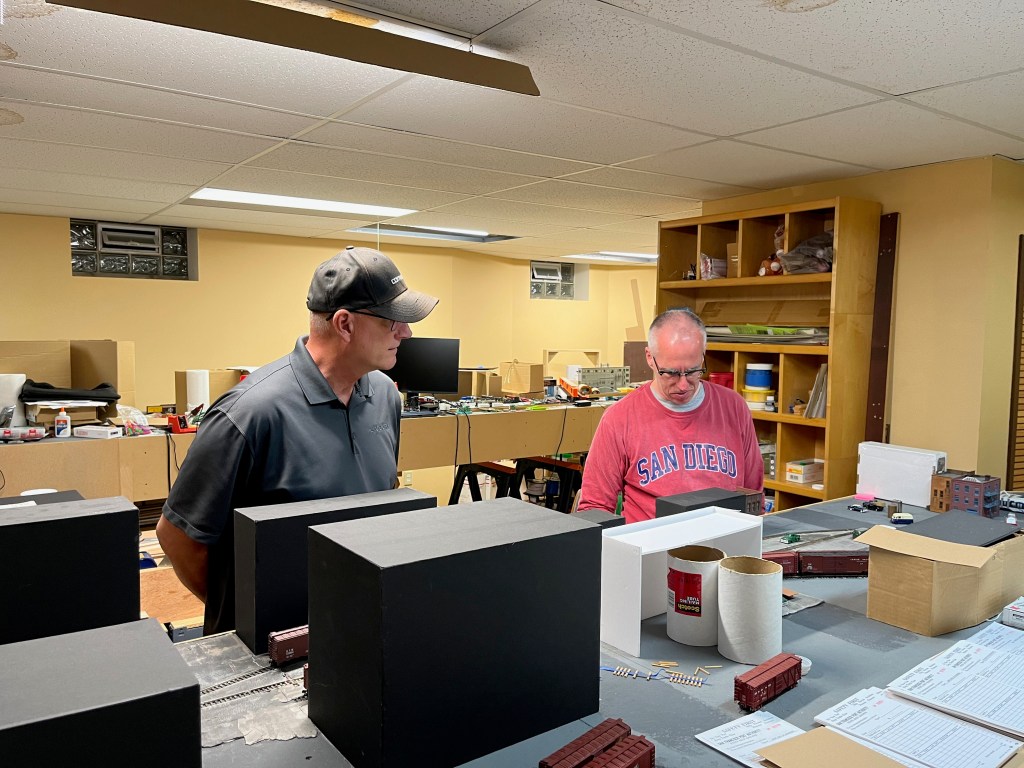
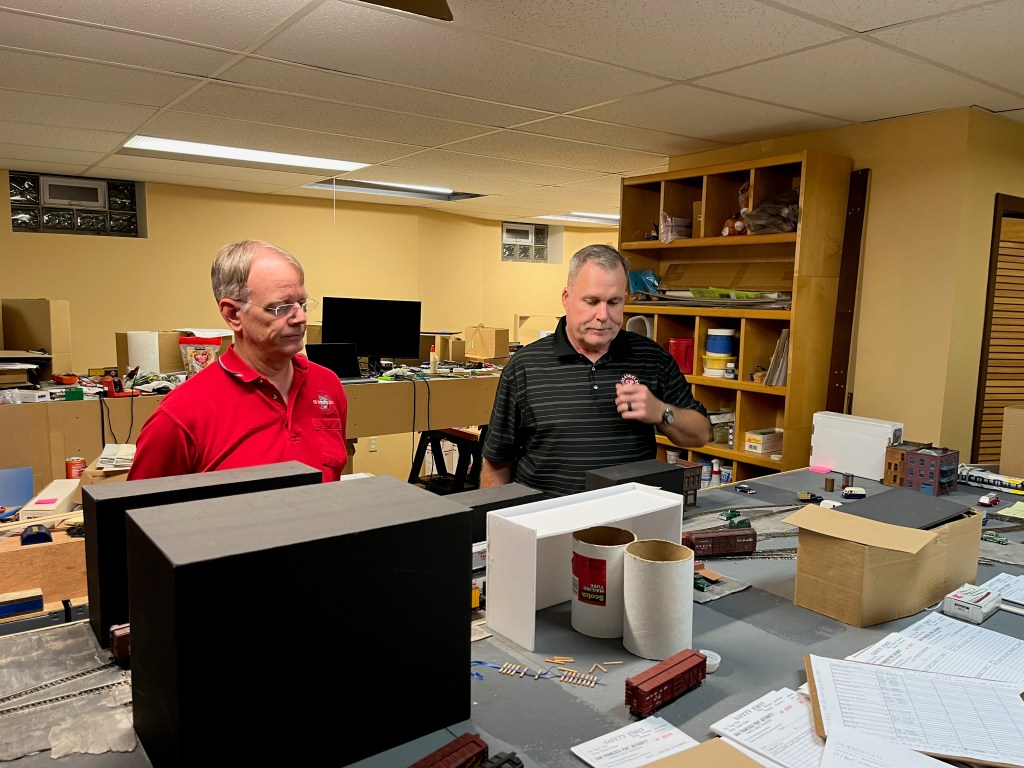
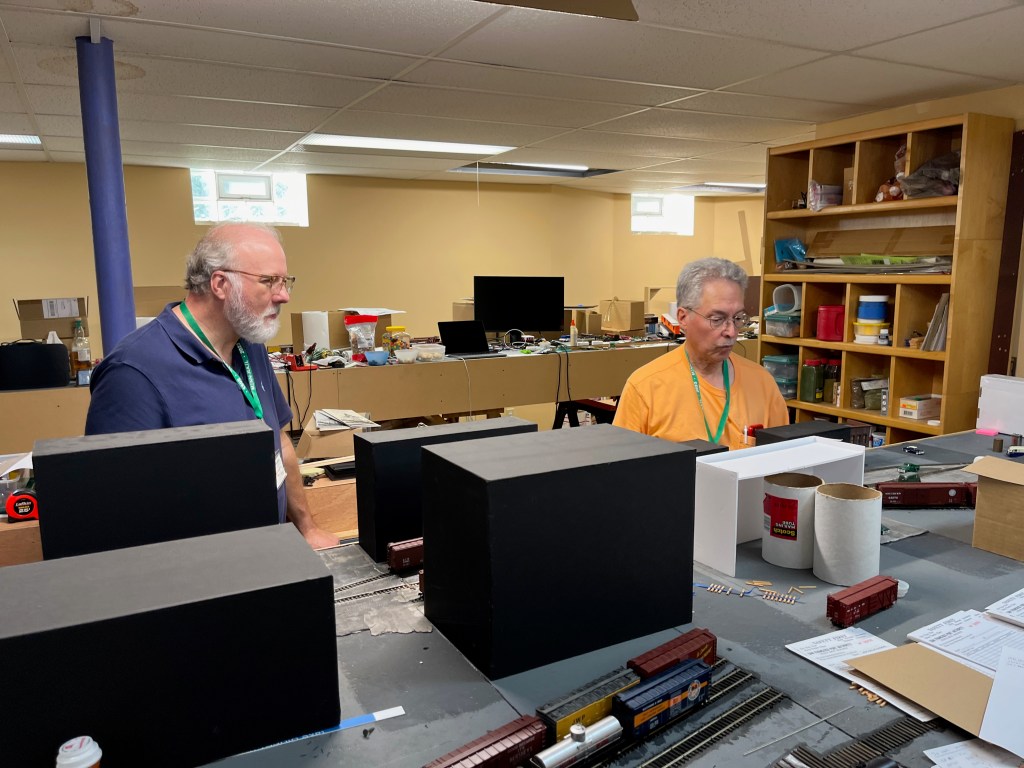
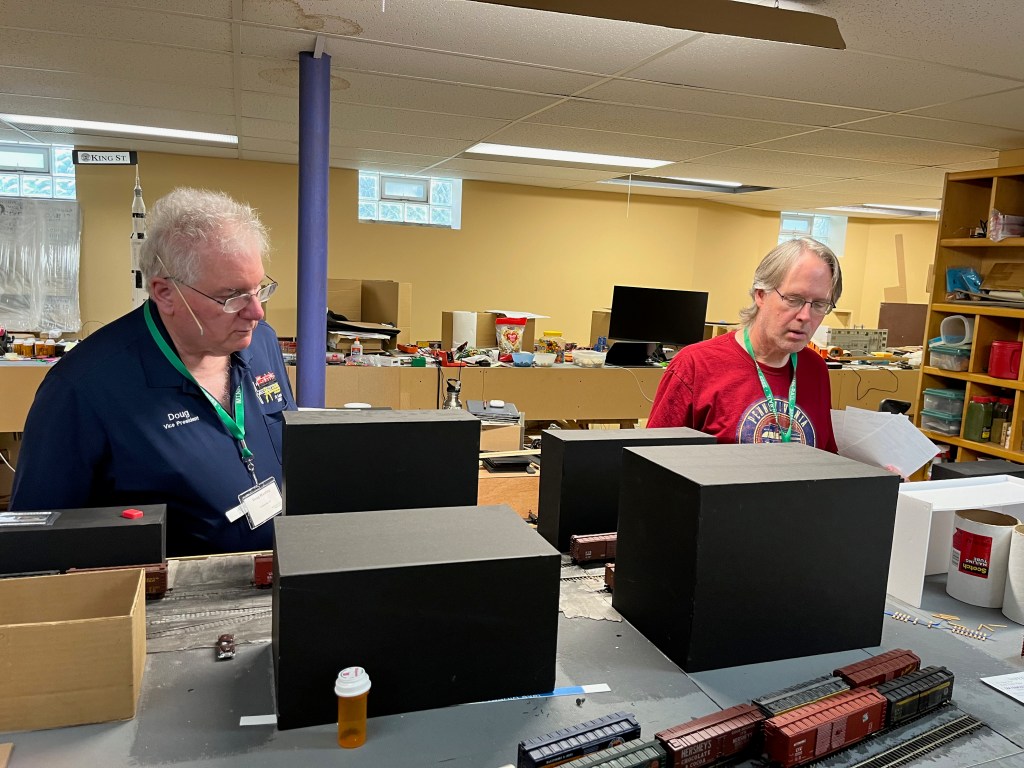
Note the building mockups in place for much of this. I built these to get a feel for sight lines, and how far people can reach around or between them (not very!). Simple cardboard rectangles with a roof glued on top – nothing fancy, but differing height and vaguely differing roof lines. I could make several of these a night, and without a doubt that was time well spent. Further south, towards Market St, these buildings get pretty tall (it is downtown, after all) and provide a nice separation between this Produce District and the “South of Market” area (that is yet to be built).
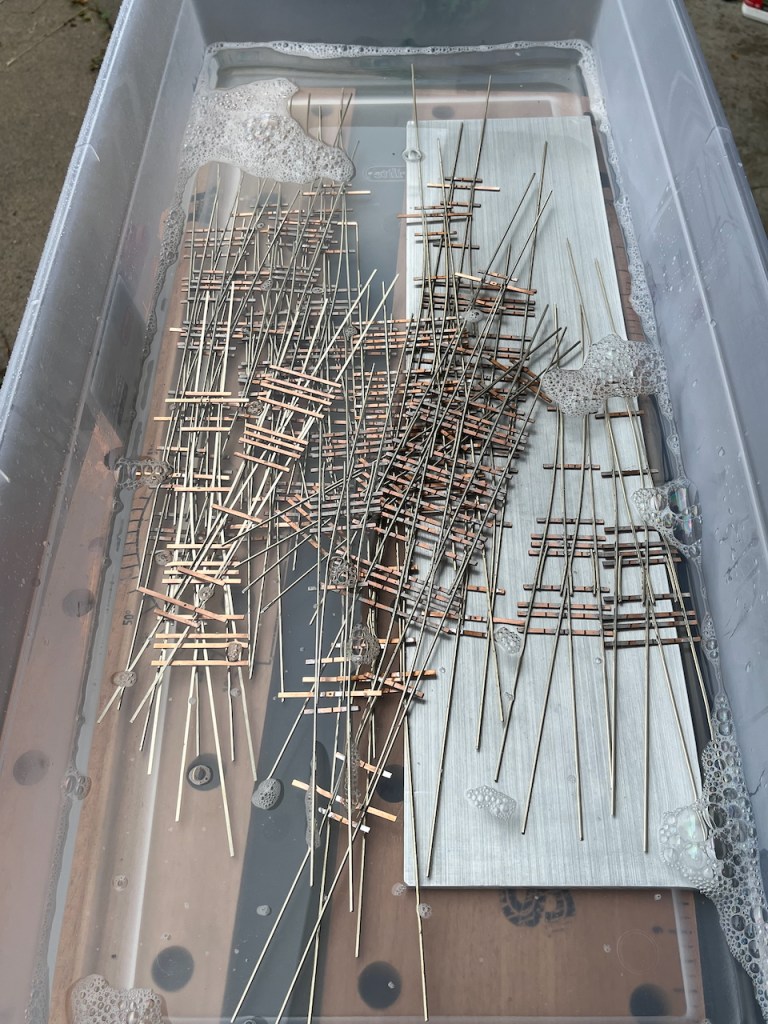
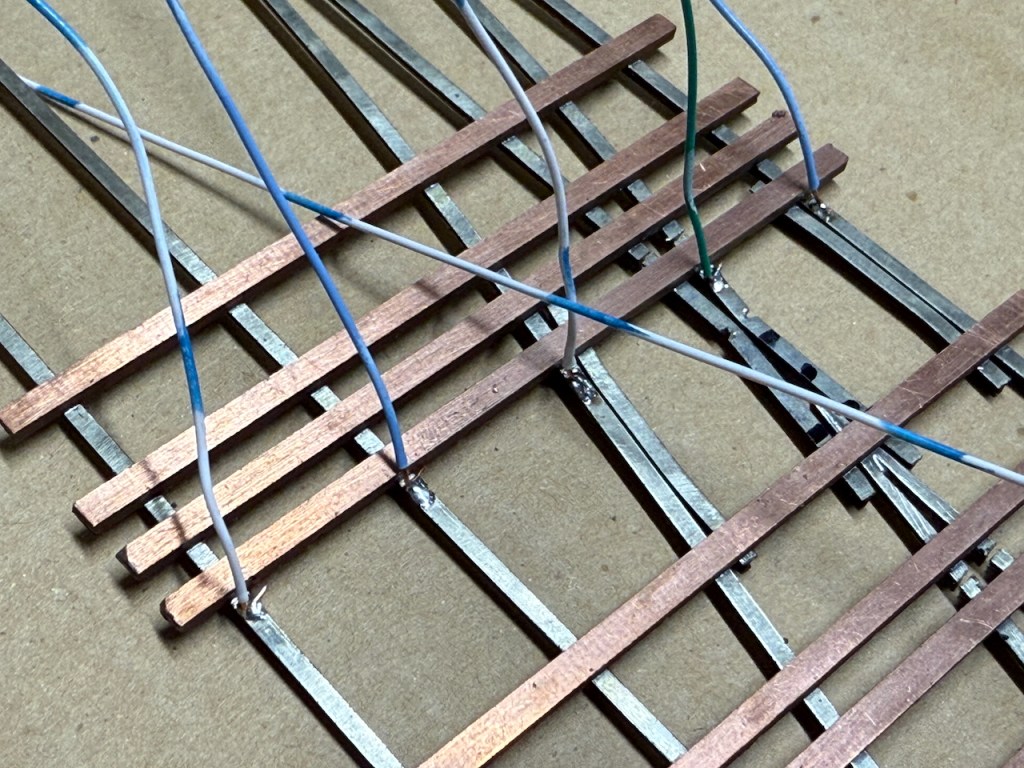
Many, many switches were built. It’s around 23, with several being crossovers. One or two a night for a couple of weeks, and then time to prepare them for installation. Proper cleaning, and then soldering drop leads. Every frog gets a wire, then a minimum of two wires (one for each “primary” rail, and on crossovers even more). “Bay Side is BLUE” is the mnemonic (track power bus wires are blue and white).
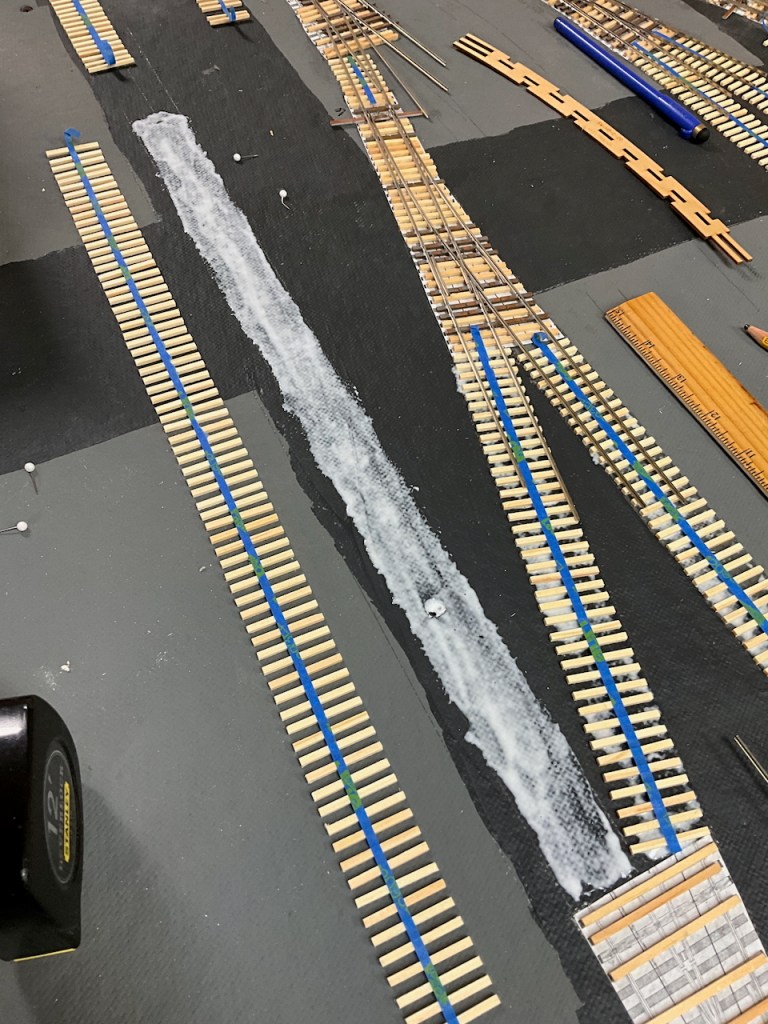
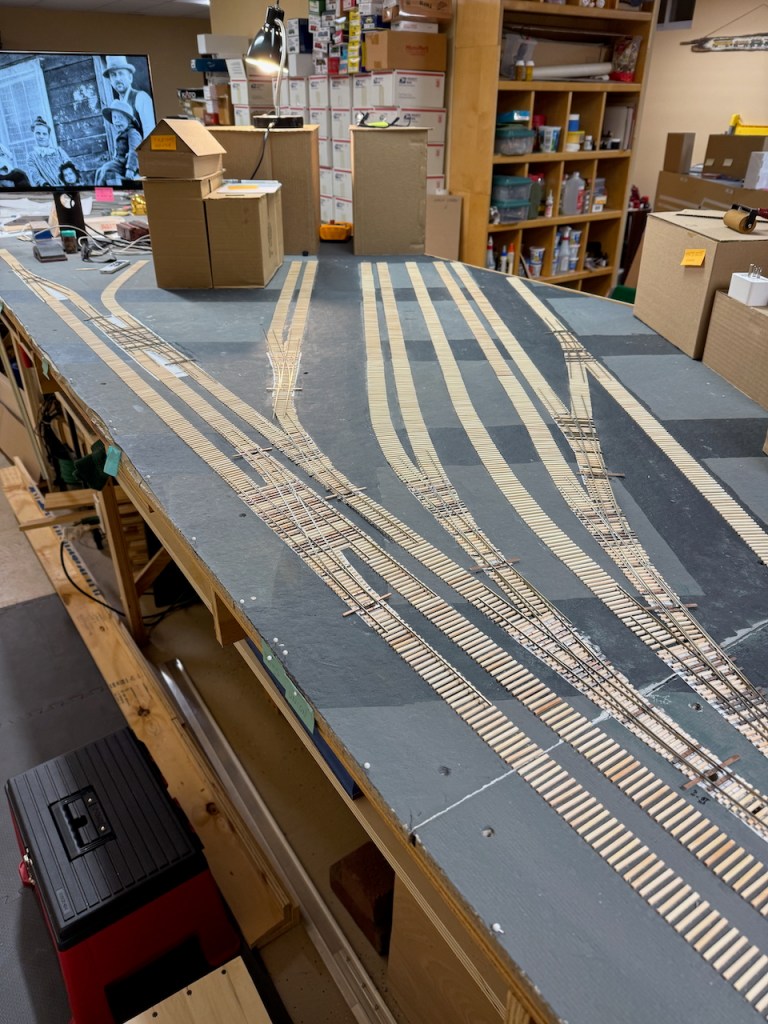
Then it’s time to lay all of the rail. Starting at the tracks along the aisle, I finished up the curves from the other portion of the layout, and then did each of the three “main” lines. Once those were all complete, down to Market St, it was time to extend the spurs inland. Many spikes were inserted (more than a few making the ultimate sacrifice — I’ve done a lot of hand laid track by now, and I don’t think I’d call myself good at it yet). Lots of gauge checking.
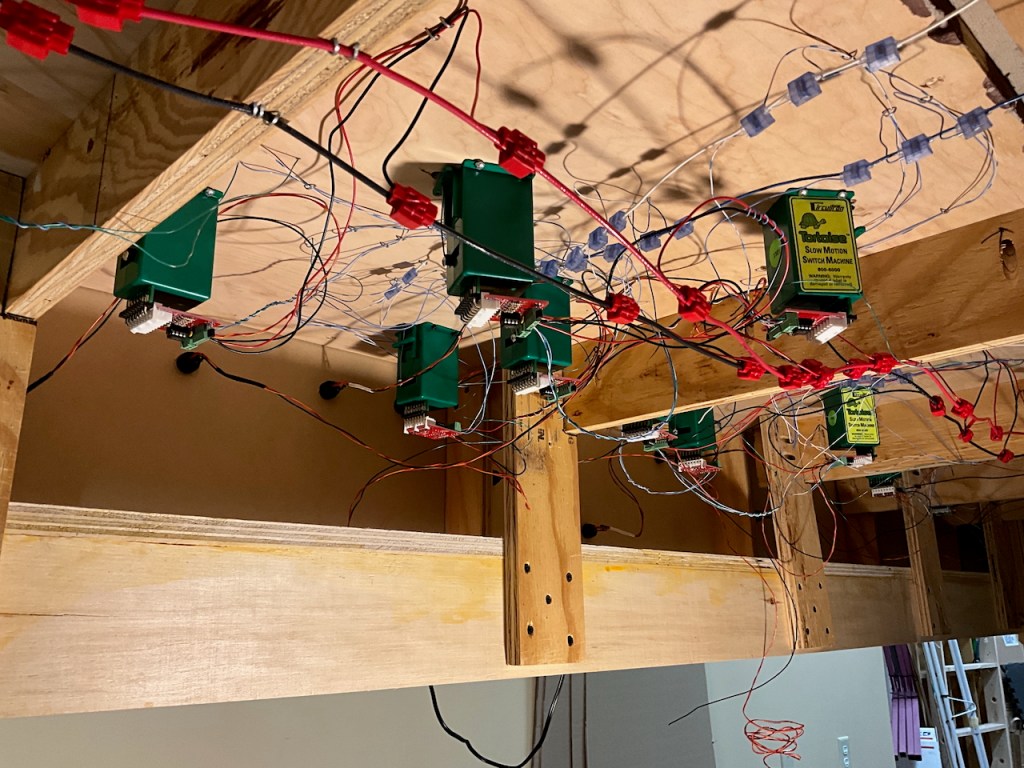
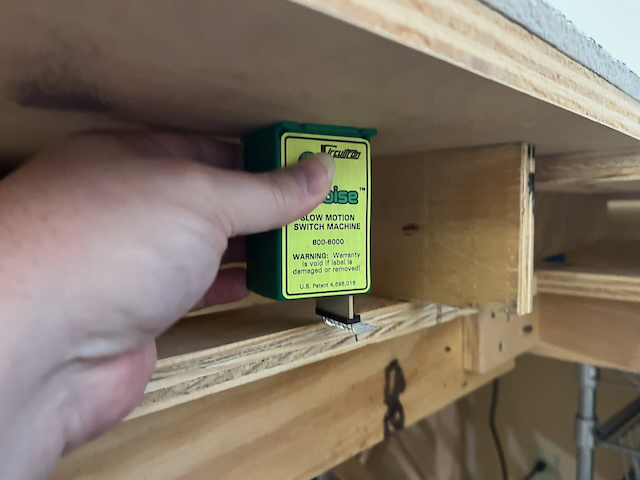
Then it’s time to install switch machines. Lots of them. This is why I lowered the L-girder: to make short order of this for those turnouts that are right above the girder (and that’s several of them). Alas, I appear to have not taken any pictures of the spaces with the Tortoises before the wiring began.
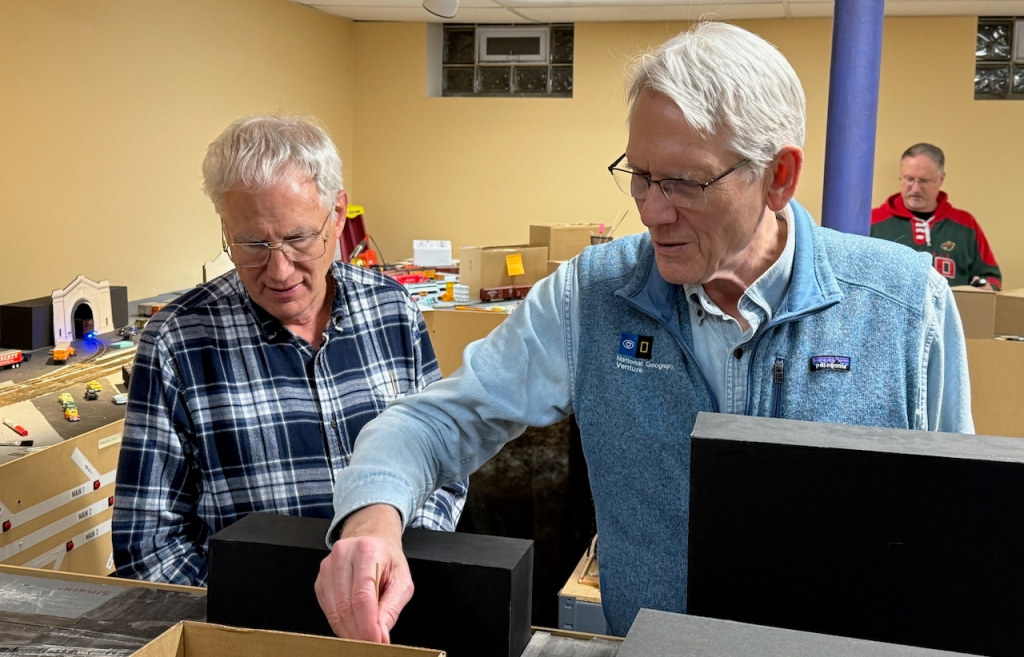
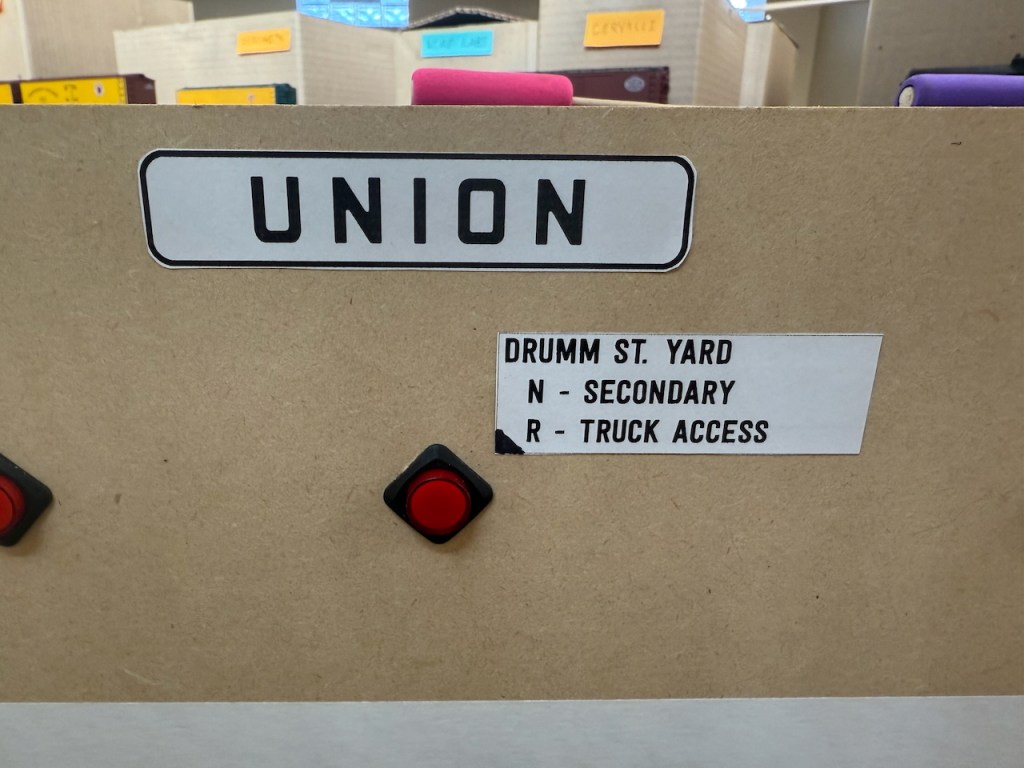
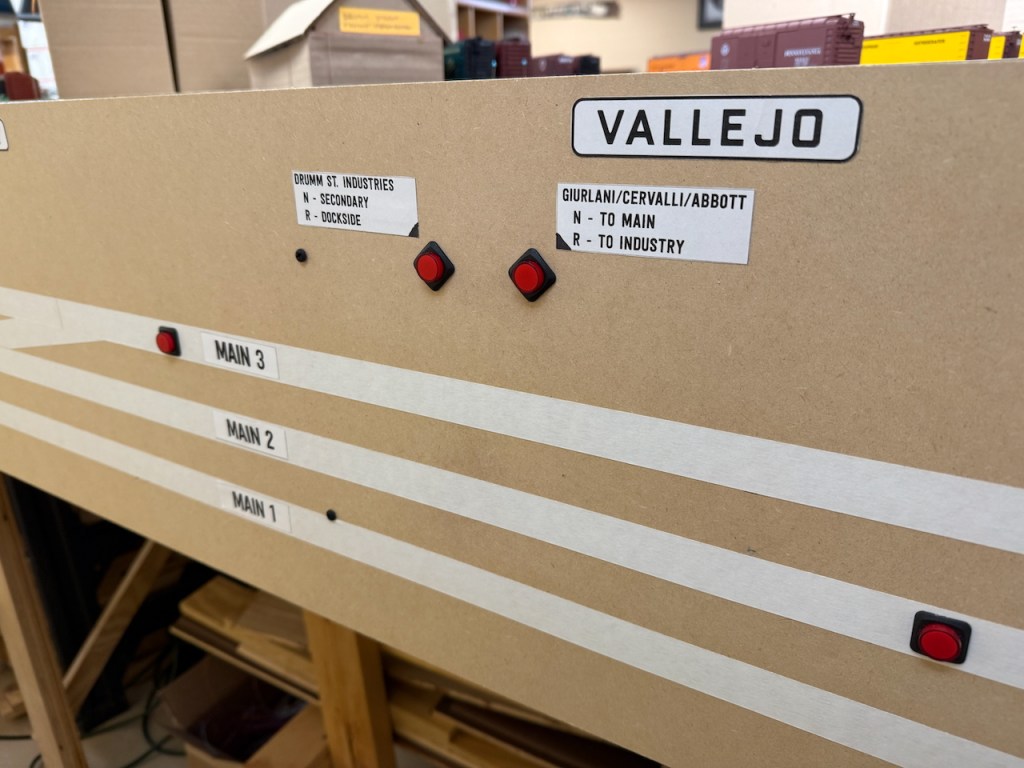
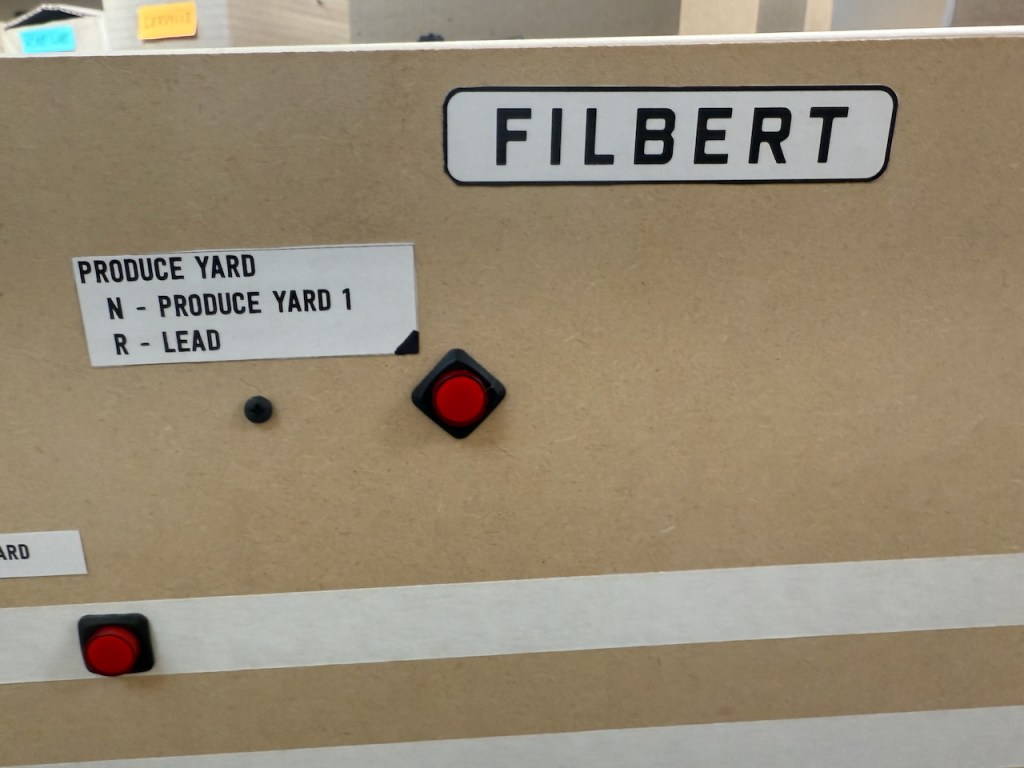
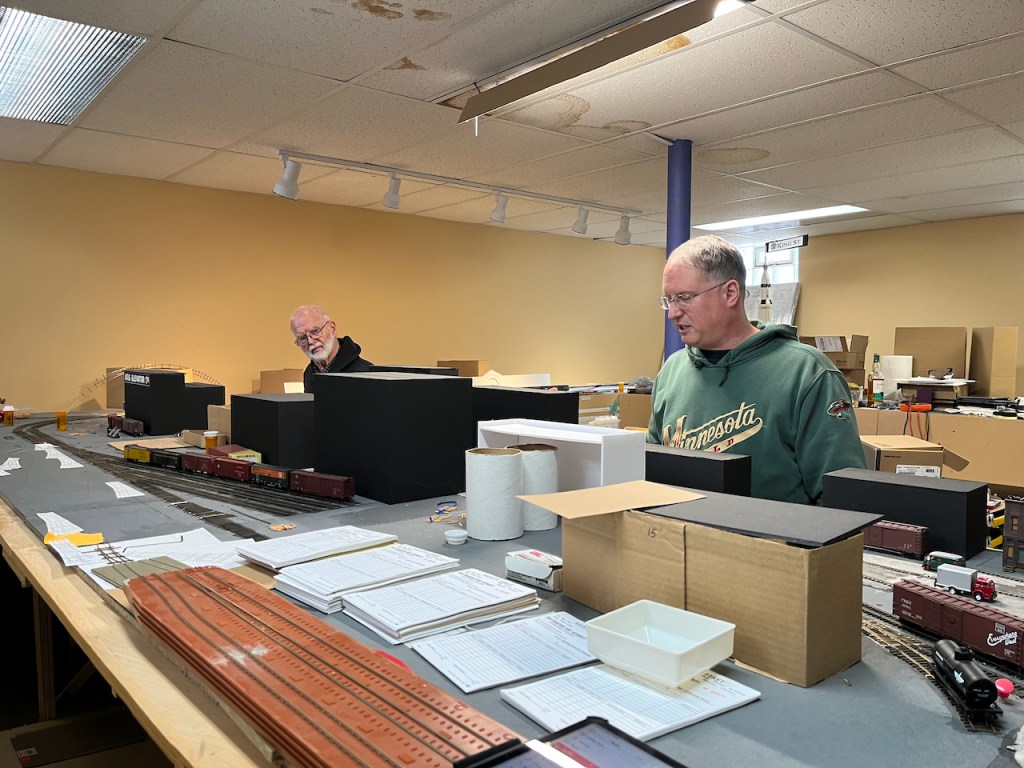
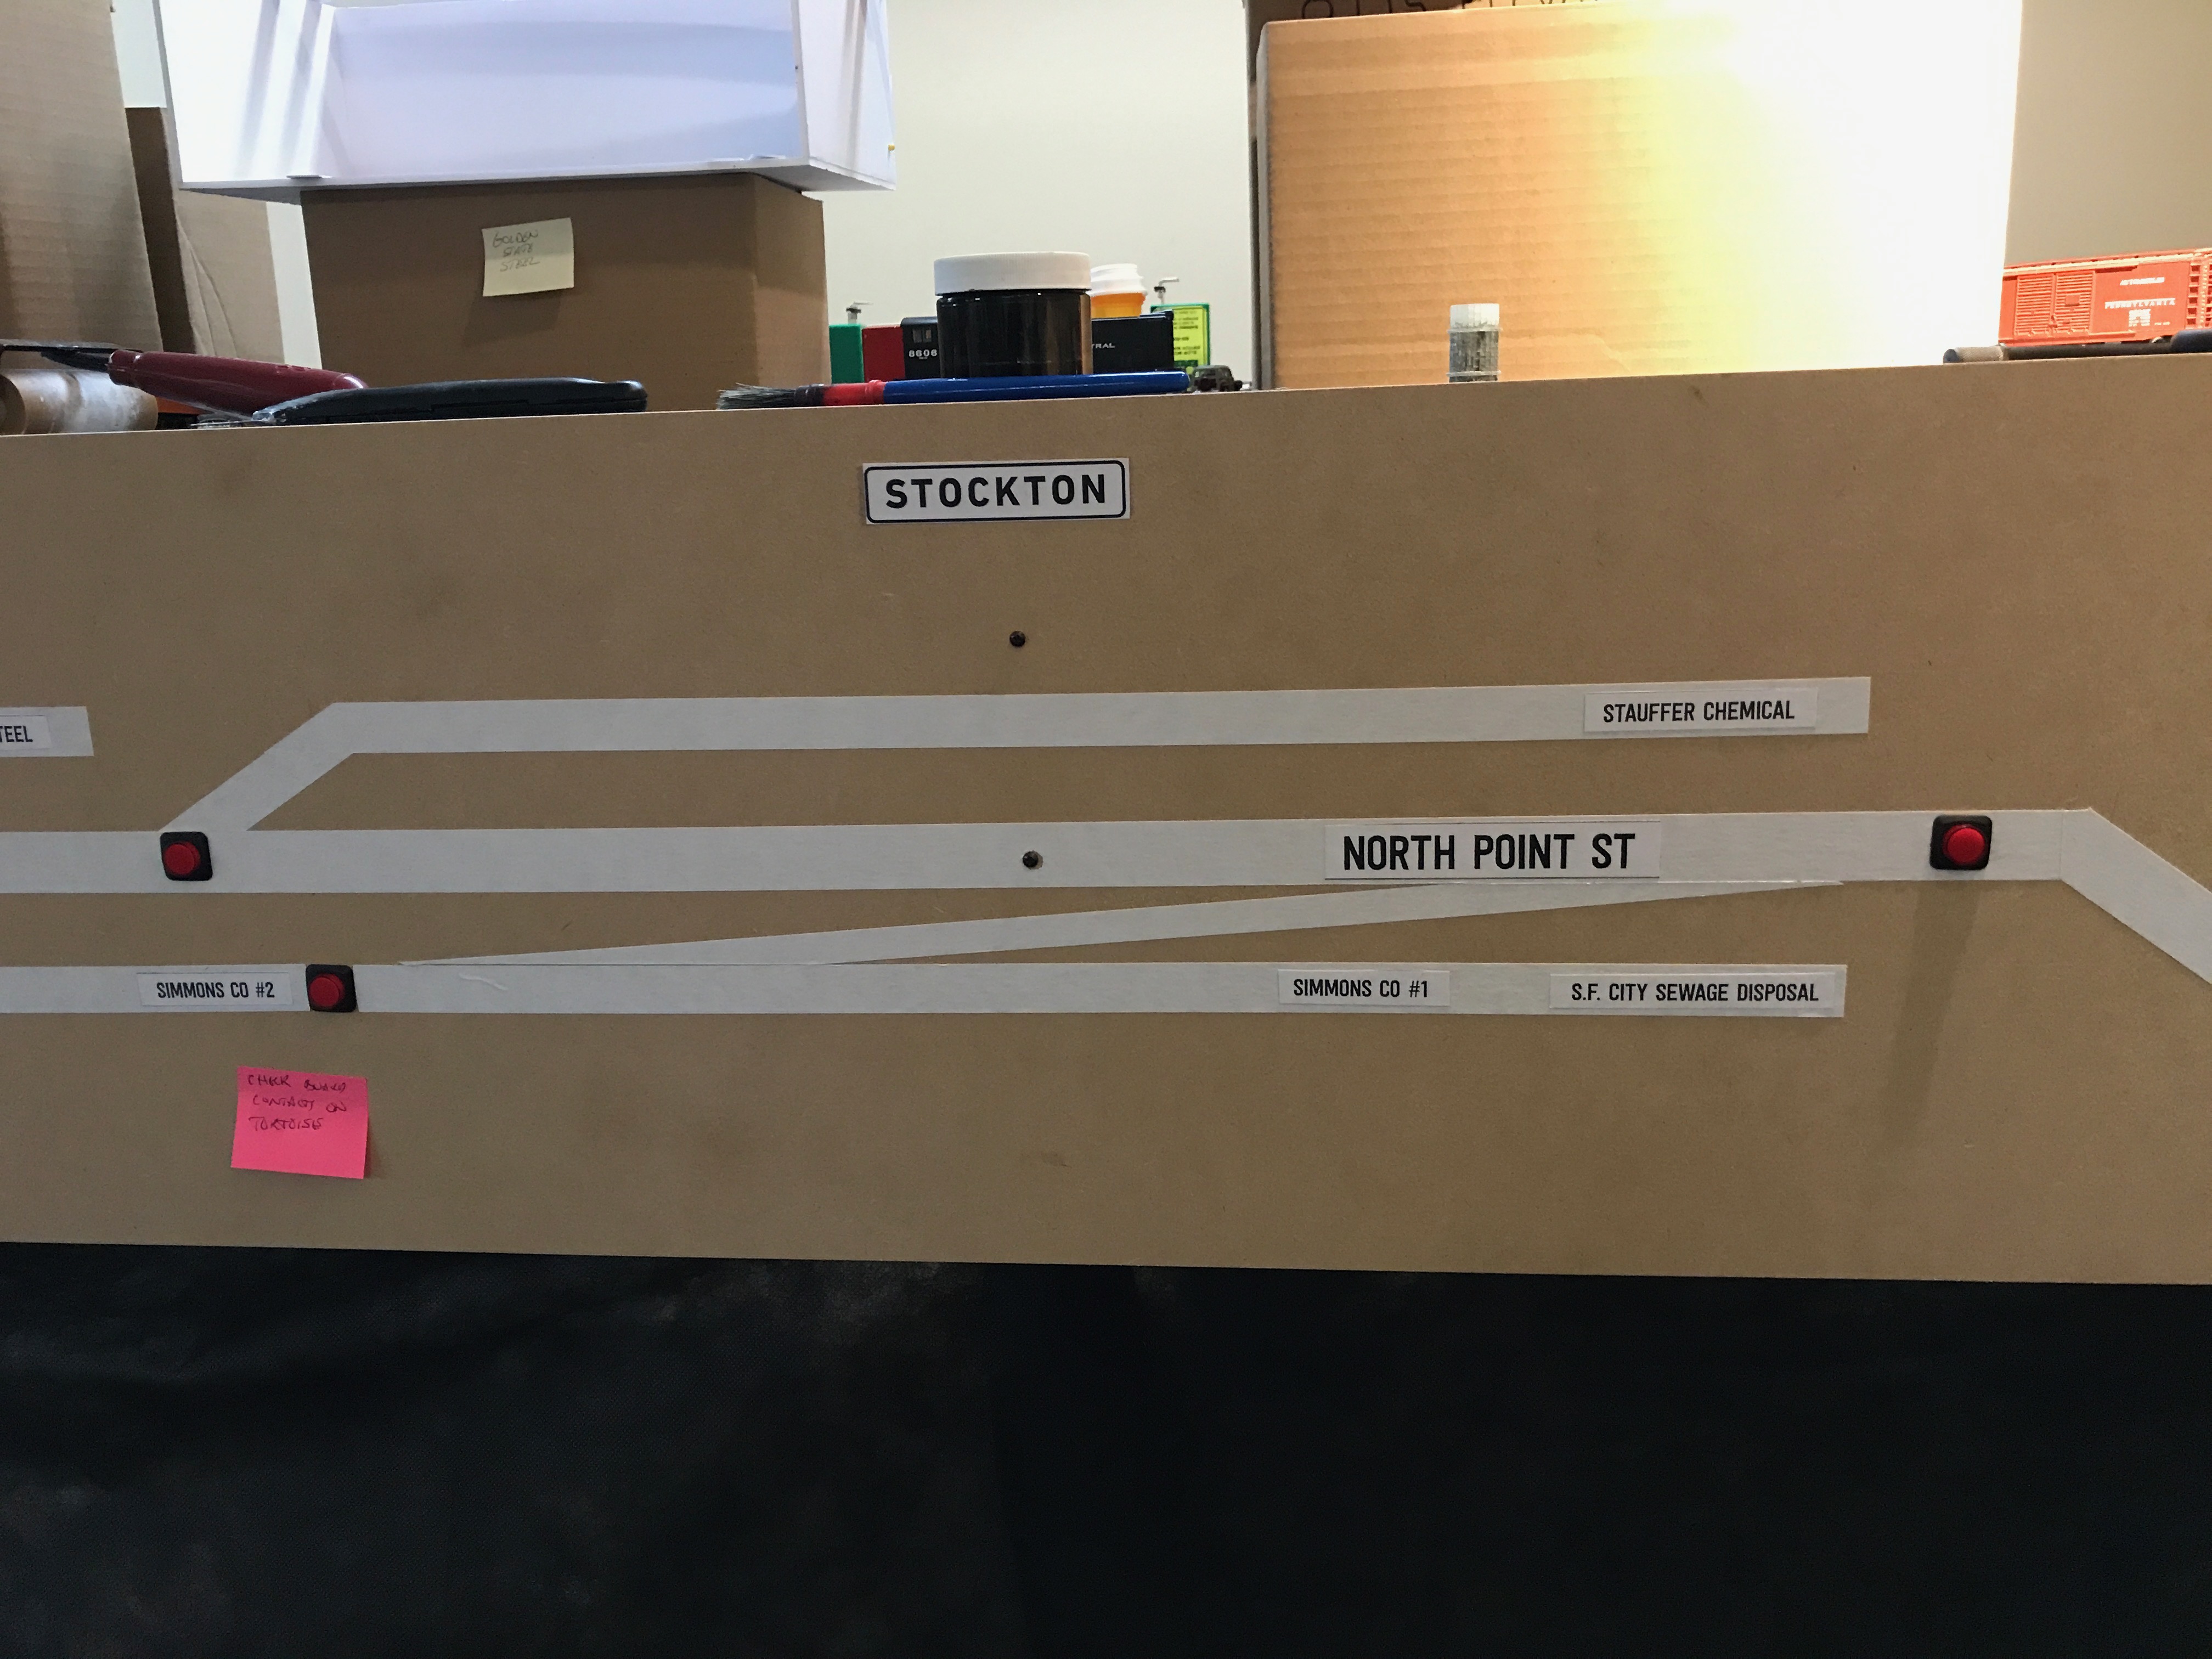
Once those were installed, it was time to put up the fascia. 1/4″ MDF, 12″ high and then cut to length. Holes drilled for the switch controls and “main” tracks indicated with tape. In other portions of the railroad, all of the other switches for spurs were able to have the same tape treatment, but that didn’t work on this section due to the sheer amount (and length) of those tracks heading away from the mains. This led me to just label each button and hope that crews can figure it out. Every switch control is straight out from the points of the associated switch. There are three groups of tracks here (Drumm St. Industries, Drumm St Yard and the Produce Yard). Each label has the grouping name (e.g., Produce Yard), and then some indication for what each of Normal and Reverse would be (e.g., Track 3 or Lead).
Oh, and all of the streets that cross the mains get street signs, using a very nice replica font for this (Fog City Gothic). Since town names don’t really do anyone any good (it’s all San Francisco), I had to find something with finer granularity to help locate things.
Then many evenings under the layout putting it all into operating shape as far as the electrons go. Power to each Tortoise control board, wires to the pushbuttons that are the operator control for each switch (latching on-off pushbuttons with built in LEDs), frog wires to the same control board which uses the Tortoise contacts to properly switch between blue & white track power feeds, and then additional track power drops.
I am a big fan of the suitcase connectors (3M 905 for 14ga to 20ga connections, and Corning UB2A for connecting the 24ga drops to a 20ga local bus extension). And please do get the correct crimping tool, especially for the UB2A. I’ve done many of them using a regular channel lock pliers, and they’re *SO* much easier to do with the right tool.

I could then move the quick-n-dirty staging tracks to south of Market, representing the SP King Street interchange and the various State Belt industries that will be in this area. Right now, it’s just two tracks (commercial turnouts & flex track, since it gets moved from time to time).
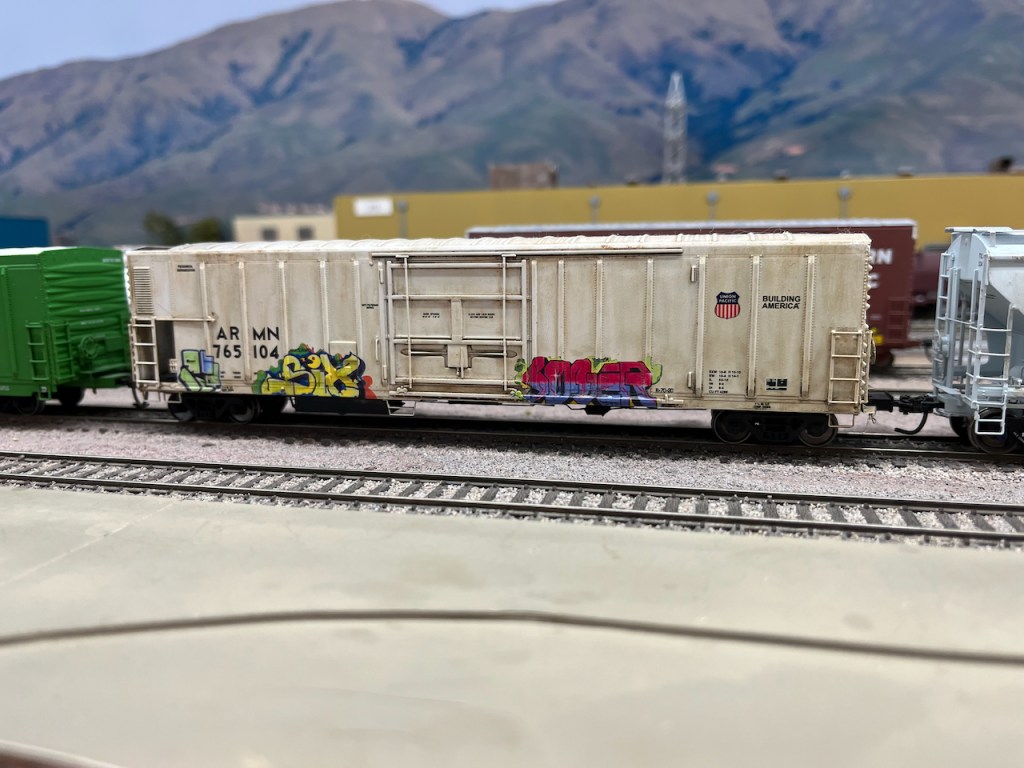
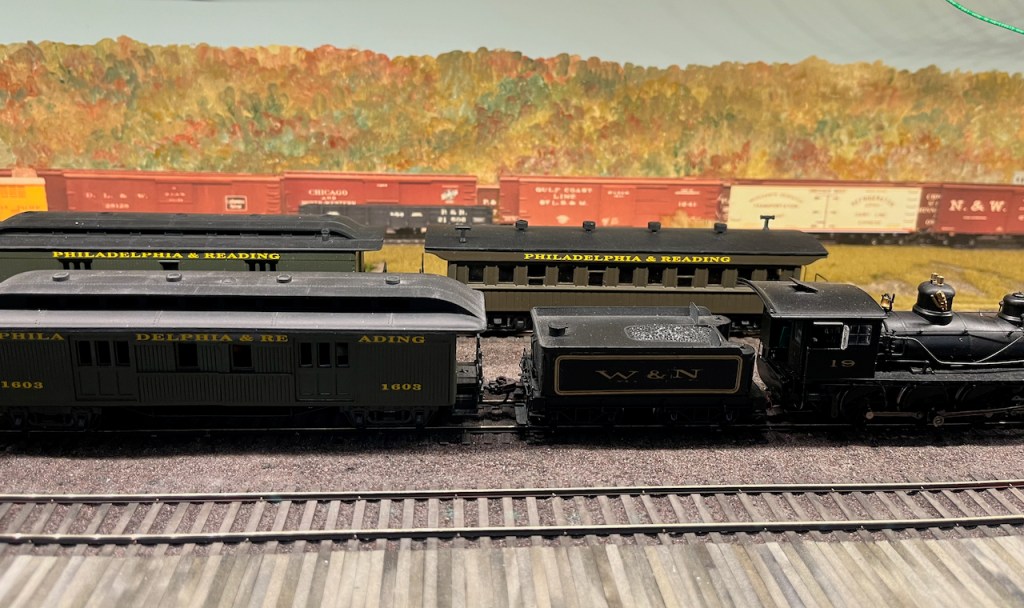
It was time then to dig out some more freight cars from storage (many of these had not seen the light of day since 2012 and the dismantling of the St. Paul Bridge & Terminal). Quick checks of wheel gauge and coupler height were performed (with only a couple of fixes needed). The road name mix is a bit off of what I would expect to see, but that can be remedied over time (for example, there are more NP reefers in my fleet than I would expect to see in SF).
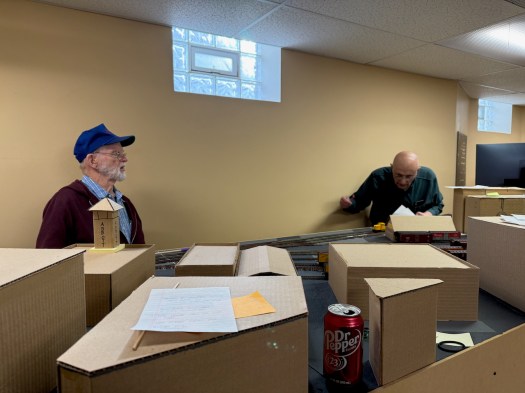
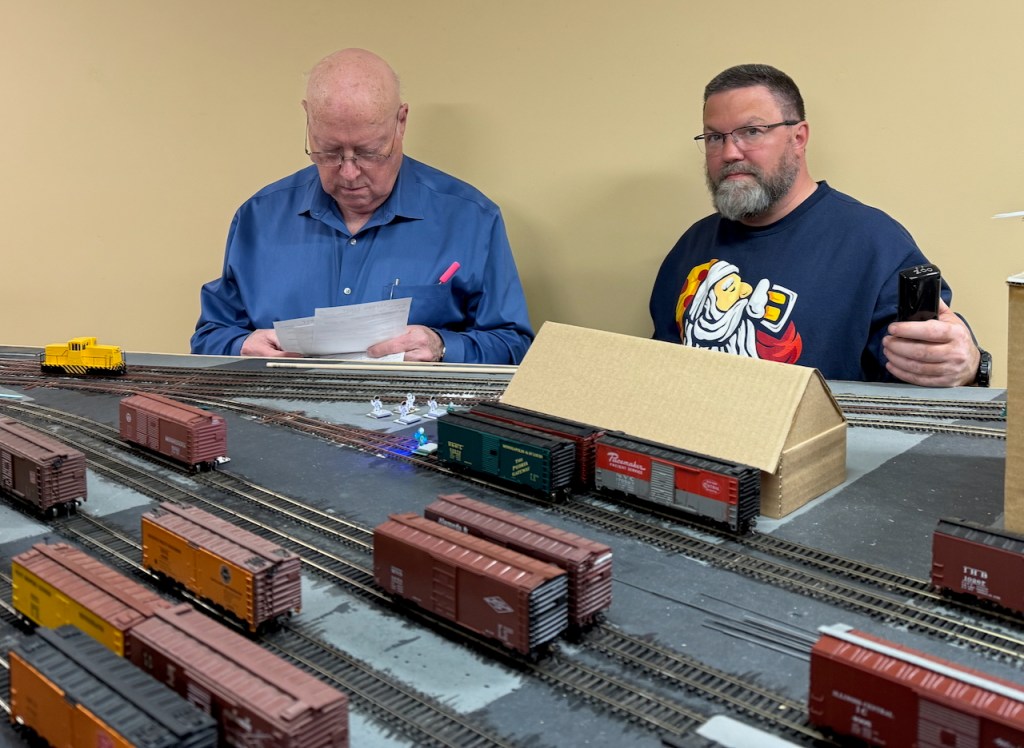
Then it was time for a break-in run of the new Produce District. On January 20, 2025, an illustrious (notorious?) crew came and ran for a couple of hours, moving some cars around per their B-7 instructions. A couple of small issues were identified, but no major concerns were found and I think they had a good time.
The Fall Campaign (part 1)
Tracklaying to me feels like a military campaign — an awful lot of stuff has to be planned out so that it all comes together in the end. There’s no single session to get it done in — it can be weeks (even months) before a significant portion of the new track work is done and ready to operate.
The next section to work on will be the Produce District. This is still in the northern portion of the railroad (where the dividing line is the Ferry Building at the foot of Market Street). Much of this is the section shown in this fantastic picture. This is just around the corner on my layout (I know, I really should come up with a drawing/diagram of how all of this fits into the basement), and is to be operated from an aisle opposite the aisle for the existing area (North Point & Pier 29). This means that there’s much more room on the benchwork for the industries, warehouse, and tracks inland from The Embarcadero, and no room for the piers.
So what makes this a campaign?
Well, given the lack of AC in the basement, I don’t like to lay track in the summer (or even until after the mid-fall change to much dryer air). But that doesn’t mean that I can’t do anything.
First, I knew that the long L-girder along the wall side of the peninsula where the next district will be was right above where the main tracks will be, the ones running alongside The Embarcadero. There was insufficient room for the Tortoise switch machines that I like to use. And even switching to some lower profile switch motor would have been difficult given the lack of clearance to move around in.
I didn’t have enough support readily at hand to hold up the entire side of the layout (about 26′ long) to lower the existing girder. So I made a new girder, installed it below the existing piece, and then built up new risers to support each of the cross members, and then removed the original girder. I’ve known for years that I needed to do this, and it always felt like a major undertaking. Yet, from start to finish was no more than a week’s worth of evenings.
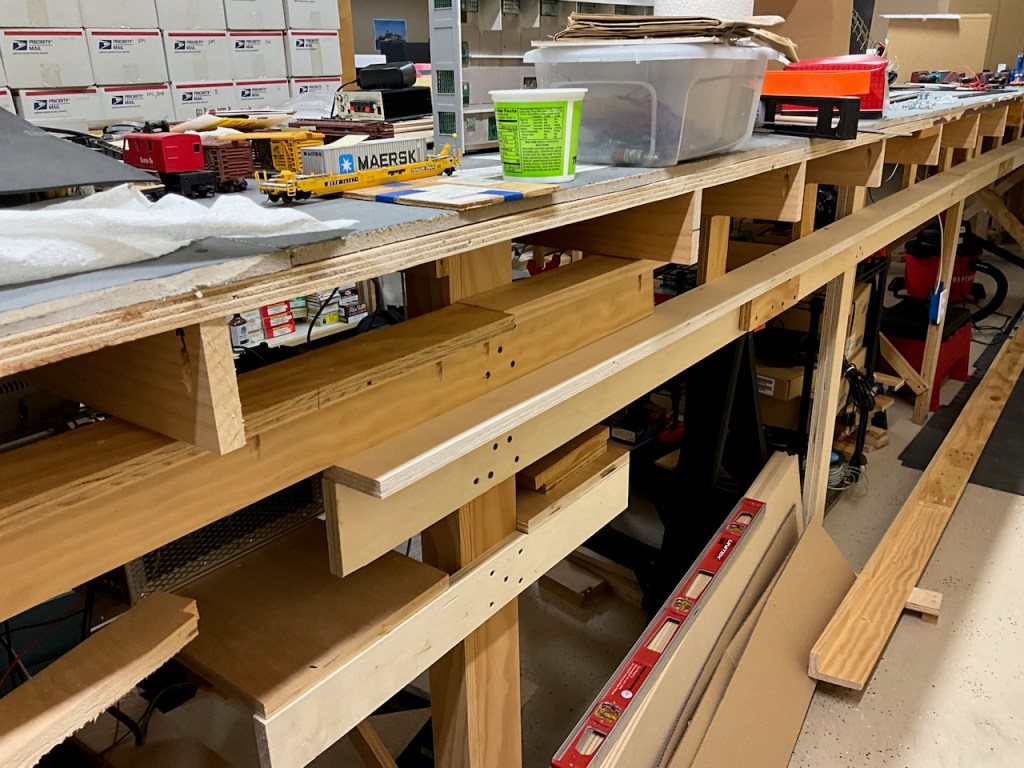
Here’s the new girder in place (the old one is on the floor). Now there’s much more room to install the switch machines. The end-most couple of feet of the old girder remained, for clearance of a bookshelf at the very end and because that last bit won’t need the turnouts right up front, as this is where the King Street SP interchange tracks will be.
Then came time to tackle the cabling mess. I’ve been accumulating all sorts of layout electronics over the years, and they’ve been on top of the benchwork for easy access. So the various cables all dangled over the edge of the layout. There are three DCC command stations in there (Digitrax DCS100, Pi-Sprog, and DCC-EX), two Raspberry Pi’s for various things, mostly JMRI interfaces to said command stations, main and programming track connectors (all using the Anderson PowerPole interfaces made popular by the FreeMo folks).

So I built a shelf under the layout (it was easily accessible now because I had to move things around to add all of the new cross-member risers from the new L-girder) and put all of the electronics bits underneath. In all of the re-arrangement I switched my primary control system to the DCC-EX based command station. Programming is done with the Pi-Sprog. The Digitrax system is kept around for backup purposes and for testing & comparison purposes. I can switch the State Belt between any of these three systems in about 5 minutes, half of which will be restarting JMRI with the proper interface selected.
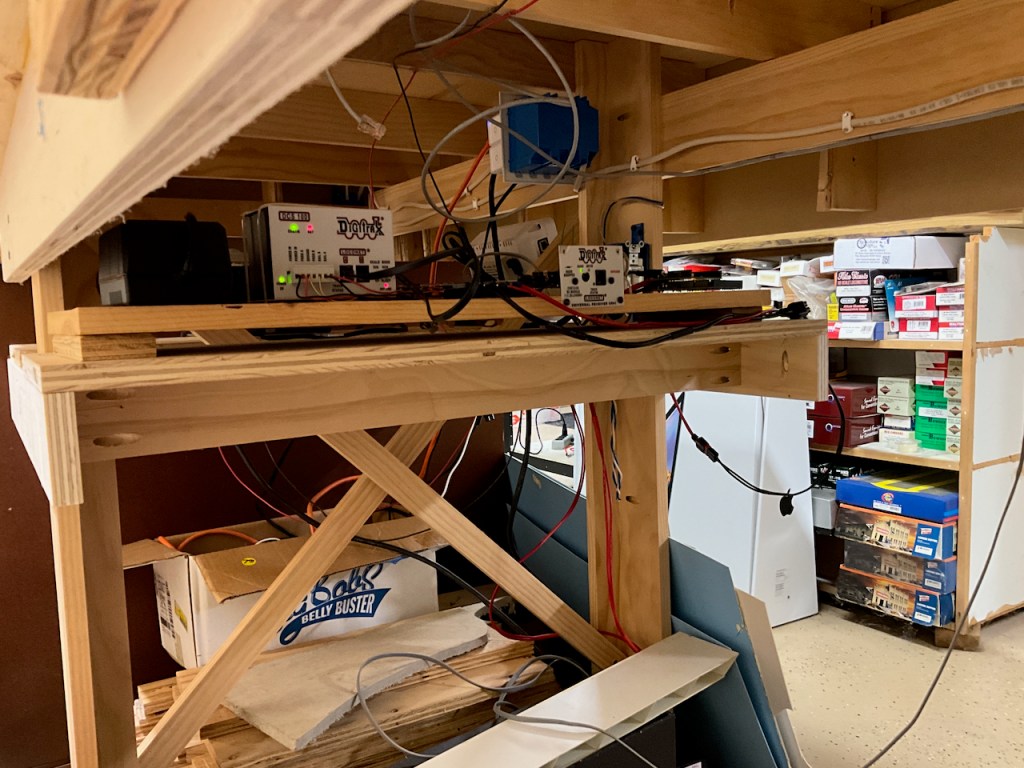
With a hole drilled through the sub-roadbed for the programming track connection, all of the cabling is now below grade and the railroad now looks much cleaner. That last cable hanging down is just because I haven’t cleaned up that section of the benchwork yet. But look at all of the crap on the benchwork. Okay, that’s got to go now too. Time to pick things up. Alas, no picture exists of clean benchwork.

Next, I’ve been laying out a street grid, and building some (semi) temporary1 building mockups to represent some notion of what the urban infrastructure here looks like, at least in the things that concern the operations. What will the view lines be across the tracks to the buildings beyond? What level of compression still manages to look right? How reachable will things be?
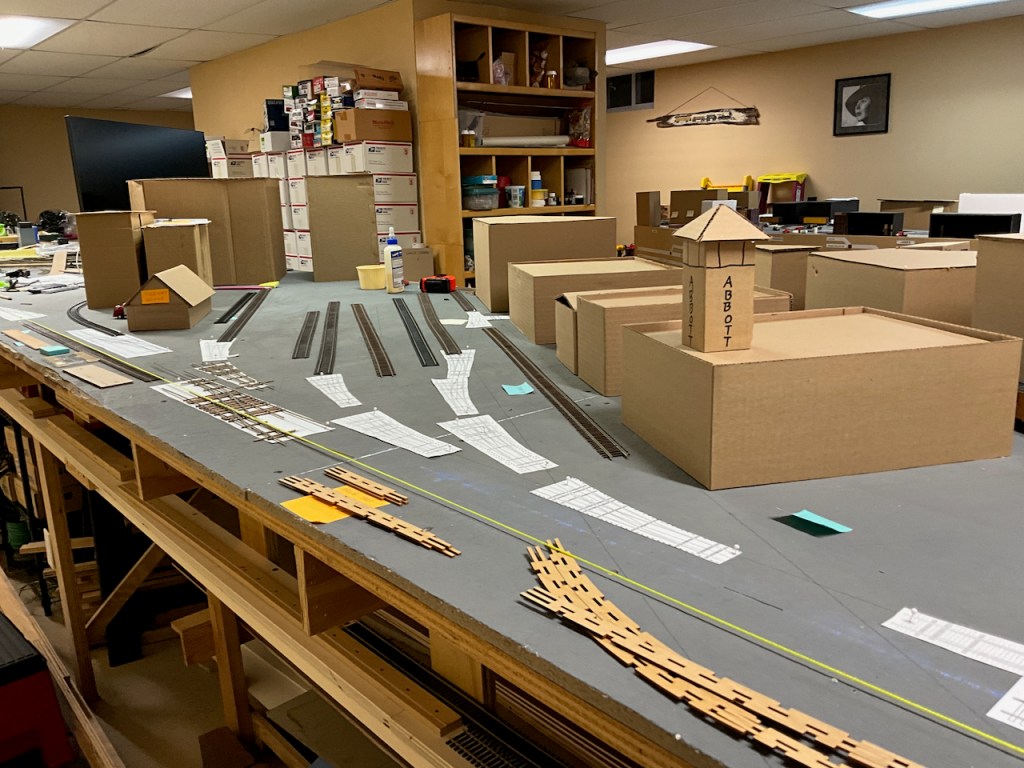
So this picture represents a vague idea of what the new section will look like. Several team tracks in the middle, spanning multiple blocks each. “Traditional” street trackage alongside the adjoining row of buildings, and some more spurs heading inland on the right hand side (and off the edge of the photo).
So what else do I need to do before I can get started?
Check with the Quartermaster, since every campaign will succeed or fail on the logistics. Whoops, my coffee can of ties is nearly empty. Whoops, my stash of rail is low. Gotta replenish those before I can start in earnest.
And I haven’t even touched a bit of track yet.
More to come soon.
- The U of Minnesota built a bunch of “Temporary” buildings in the influx of students just after World War 2. The last one was finally taken down a couple of years AFTER I started in the mid 1980’s. “Temporary North of Appleby”: you will not be missed. ↩︎
Happy New Year, everyone!
Well, that’s another one behind us all.
In 2023, the State Belt hosted 7 sessions for people who had never operated here before, and (at least) 5 more for returning guests. I’m pretty happy with that, especially since it had basically been shut down since the autumn of 2017.

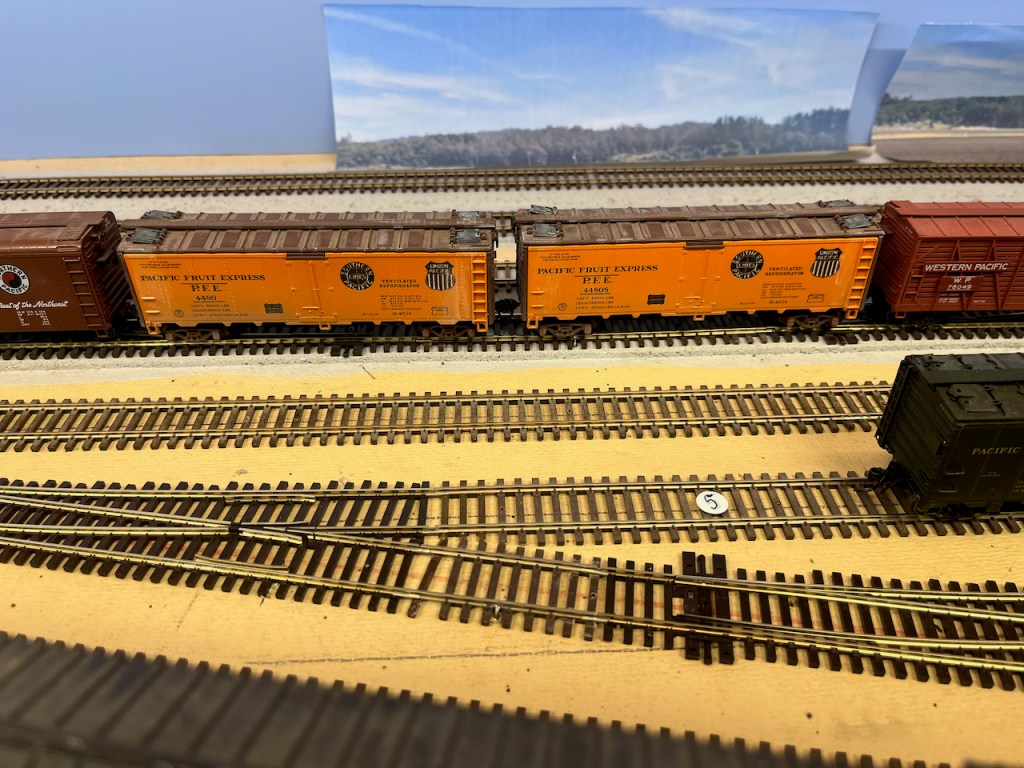
Finally feeling a bit more confident in traveling these days, I got the chance to bang around a few PFE reefers on various layouts during BayRails in March:
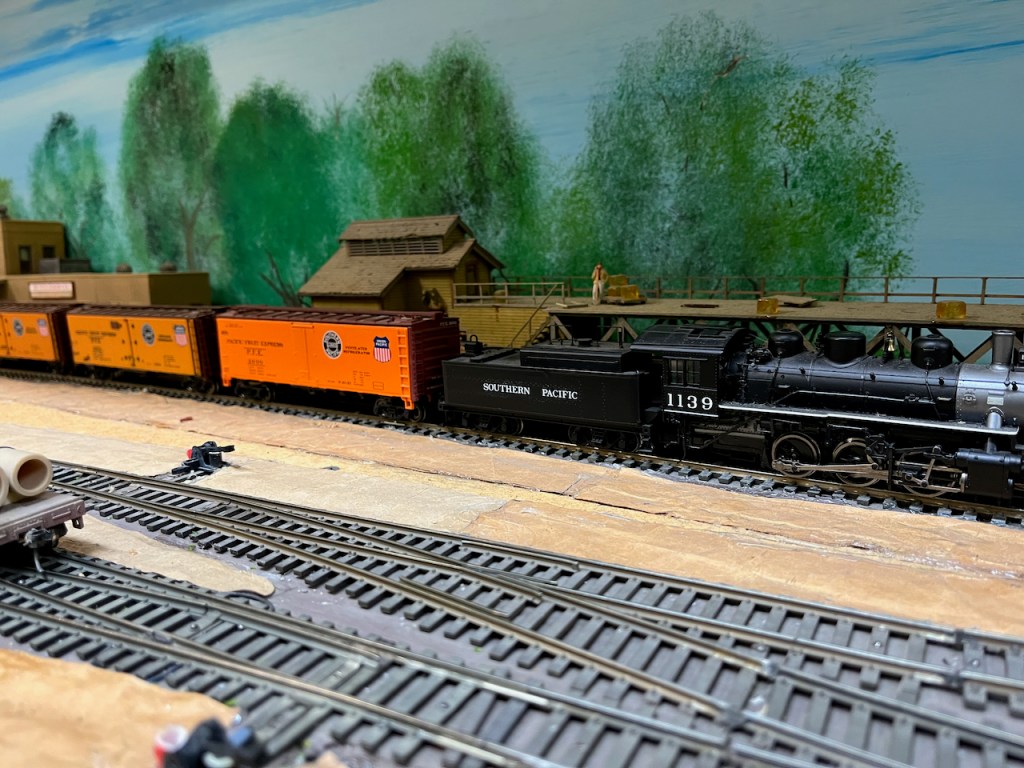

and then moved a few more cars in Omaha in October:
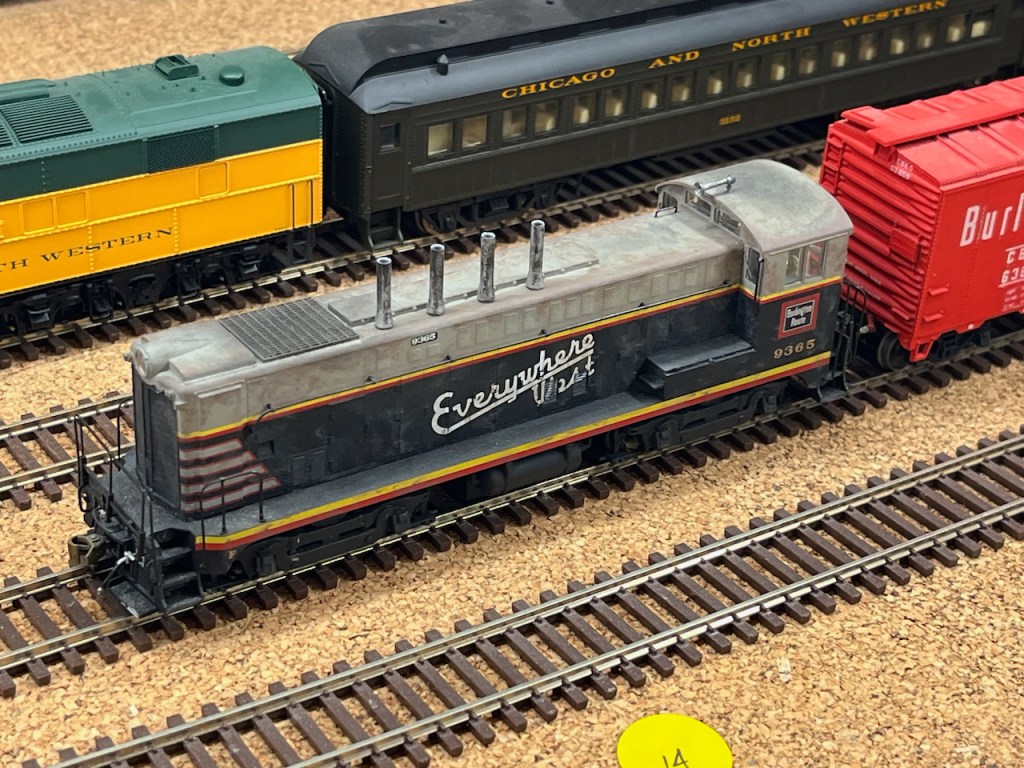
I’ve been learning a lot of things lately, including sign making with CNC routers, creating buildings with a laser cutter, and carving up some locomotive frames with a real mill. There will be details on those in the coming months, as the progress gets further along and there are some “after” pictures.
I hope your 2024 is your best year yet!
Whew!
Six op sessions in 15 days. With MinnRail 2023 now behind us and I’ve had a chance to rest, here’s a recap of recent activities.

Here’s what the completed work along The Embarcadero looks like. Nine pier tracks, each holding a couple of cars (well short of the dozen or more that the prototype could hold, but I can live with that). Some are facing point and some trailing point, so the crews have to think a bit and plan ahead. I managed to find a couple of boxes of vehicles from the previous layout, so the street isn’t completely devoid of traffic, although it’s still pretty sparse.
I ran several op sessions last spring, for the first time in quite some time (years!), just to get back into the swing of things. And then in preparation for my MinnRail sessions, I invited six local operators who hadn’t been here yet (and therefore don’t know what I’ve done or what tricks one might use to keep moving) to three different sessions. Each of those went fairly well, with only a couple of turnout motors not behaving properly for us. Those got fixed, and then three crews from out of town came over this past weekend for the “official” sessions (the Seniority Roster has been updated accordingly). Those three sessions were all but flawless — just a couple of derailments that couldn’t be explained to human error. Everything else was smooth sailing.
A fantastic picture
,_USS_New_Mexico_(BB-40)_and_USS_Kitty_Hawk_(APV-1)_docked_at_San_Francisco,_California_(USA),_on_10_February_1942_(80-G-K-1026).jpg)
The picture was ostensibly taken because of the battleship Pennsylvania docked here at one of the piers on the North end. This photo was taken in February 1942, after the ship had completed major work at the San Francisco Naval Shipyard, repairing the damage suffered in the Pearl Harbor attack of December 7, 1941.
But look just inland. THAT is the realm of the State Belt. The roundhouse is near the top of the picture (we’re looking northwards here). The Embarcadero is a major street running along the waterfront, and the Belt’s trackage is immediately inland of the road, with spurs and other tracks plum near EVERYWHERE.
Look at all of the orange cars (I’m making the assumption that most of them are PFE reefers). Just inland from the battleship, you can find a few cars just parked parallel to the road with a truck parked across the rest of the tracks, presumably transferring goods between the RR car and the truck.
This is a BIG picture. Zoom in on it. I hope you find it as fascinating as I do.
Here’s a story about building up a battleship task force about to head out to war.
Long time since an update
Back in 2017, after the last Minn-Rail op session of the weekend, I took time away from the layout in order to design & build a proper Wi-Fi throttle. That project lasted until earlier this year.
I’ve since returned to working on the railroad itself. Starting with a general cleanup (as flat surfaces tend to accumulate stuff), and then I embarked on a track laying campaign.
Laying track over the summertime here in my basement isn’t a good idea — it’s not terribly well humidity controlled, and I get some significant expansion/contraction cycles. The inner track really buckled badly – I get that prototypes sometimes have bad track, but this was ridiculous. So that had to be pulled up and replaced.

Next I started working on the pier tracks, which really are the entire reason the railroad exists. Simple logistics dictate that I can’t have as many as I’d like, nor can they hold as many cars as I’d like, but I can fit in 9 pier tracks, each holding two car spots. I think that’s enough to get a good feel for what their operational interest is.
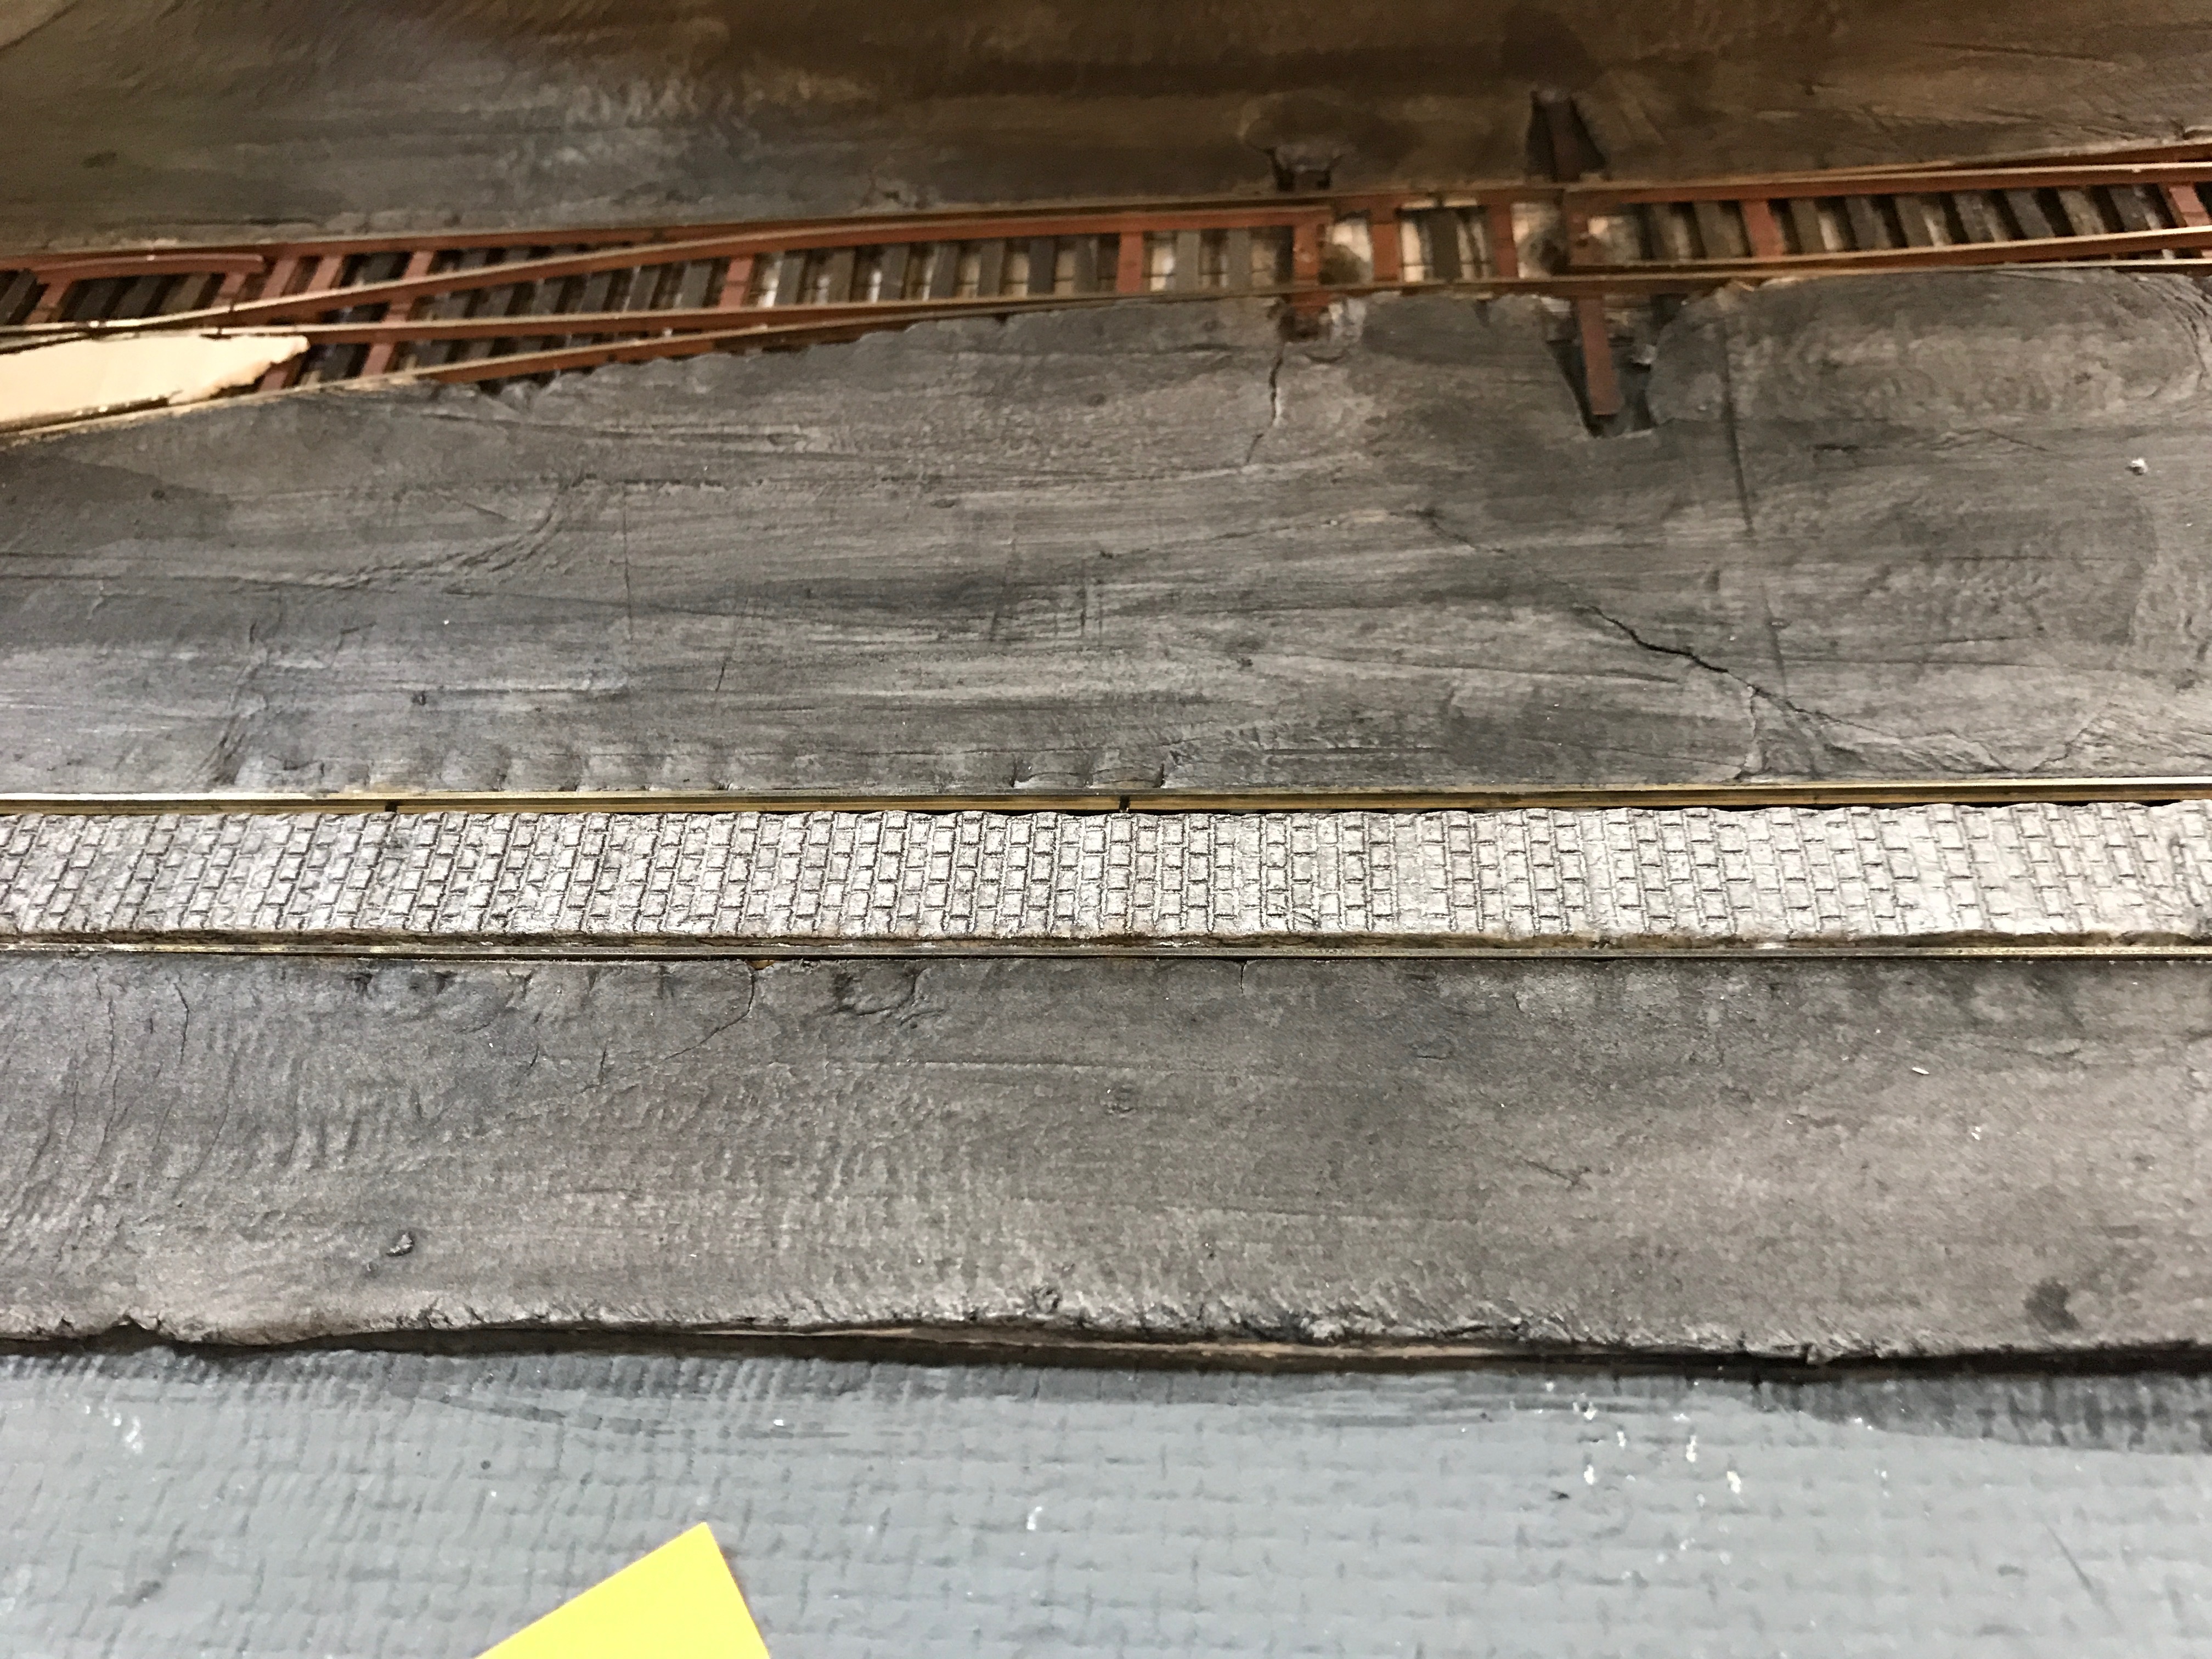
This entailed finally building the 3rd track along the Embarcadero, and setting up all of the switches to cross the street and then head into a pier bulkhead. Those bulkheads are THE defining visual characteristic of the San Francisco waterfront. All of the piers north of the Ferry Building shared a common appearance, although some have been modified and modernized over the years.

This was the result of a couple of hours searching for a good picture of a pier bulkhead, figuring out the proper scale, and then printing out a copy. I’m pretty happy with the general sizing & appearance, and now I need to edit in the proper pier numbers (21 through 33) and build up a more complete structure instead just the simple building front.
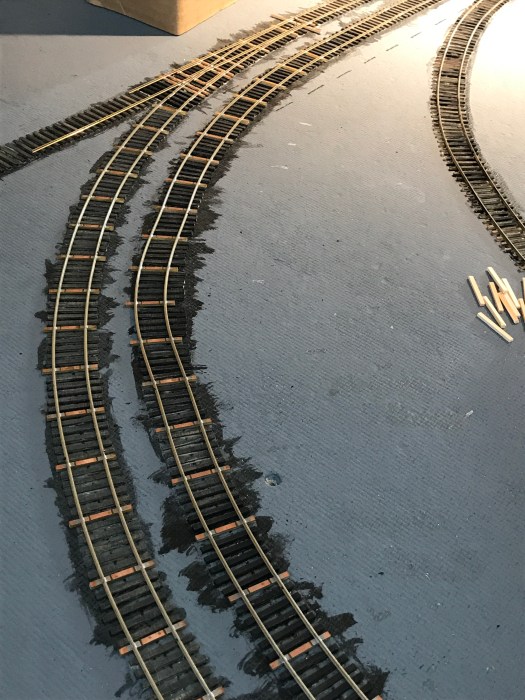
The rightmost (rearmost) track is the one that’s mostly new. There’s now an additional runaround track for the North job. At the far end of this picture is the set of curved tracks pictured above, now much less wonky and having stayed that way through several seasonal changes. Those two tracks head over to Pier 43, where the car floats from the Santa Fe and Western Pacific dock. The ATSF float also services the Northwestern Pacific float dock in Tiburon.
The three mainline tracks in the foreground of this photo will curve around towards the left, and head to the South end of the railroad, terminating at a set of tracks at King Street, where the Southern Pacific leaves us a bunch of cars, and we can drop our interchange cars for the SP as well.
I’ll update soon with some pictures after the construction was completed.
Many small things happening
I’ve been doing a bunch of things, trying to get ready for the “public” debut of the State Belt this October. I plan to host several sessions around the Minn-Rail timeframe, some as official scheduled ops and others as can be fit in to suit the schedules of the out of town guests.
To that end, I’ve been trying to do a bunch of smallish things to make the layout more friendly towards guests. Every cross street is labeled (Stockton, Bay) with more or less accurate San Francisco style street signage. Each industry gets a label on the spur on the fascia (since the industries themselves don’t have much in the way of signage yet, see Stauffer Chemical or Simmons Co).
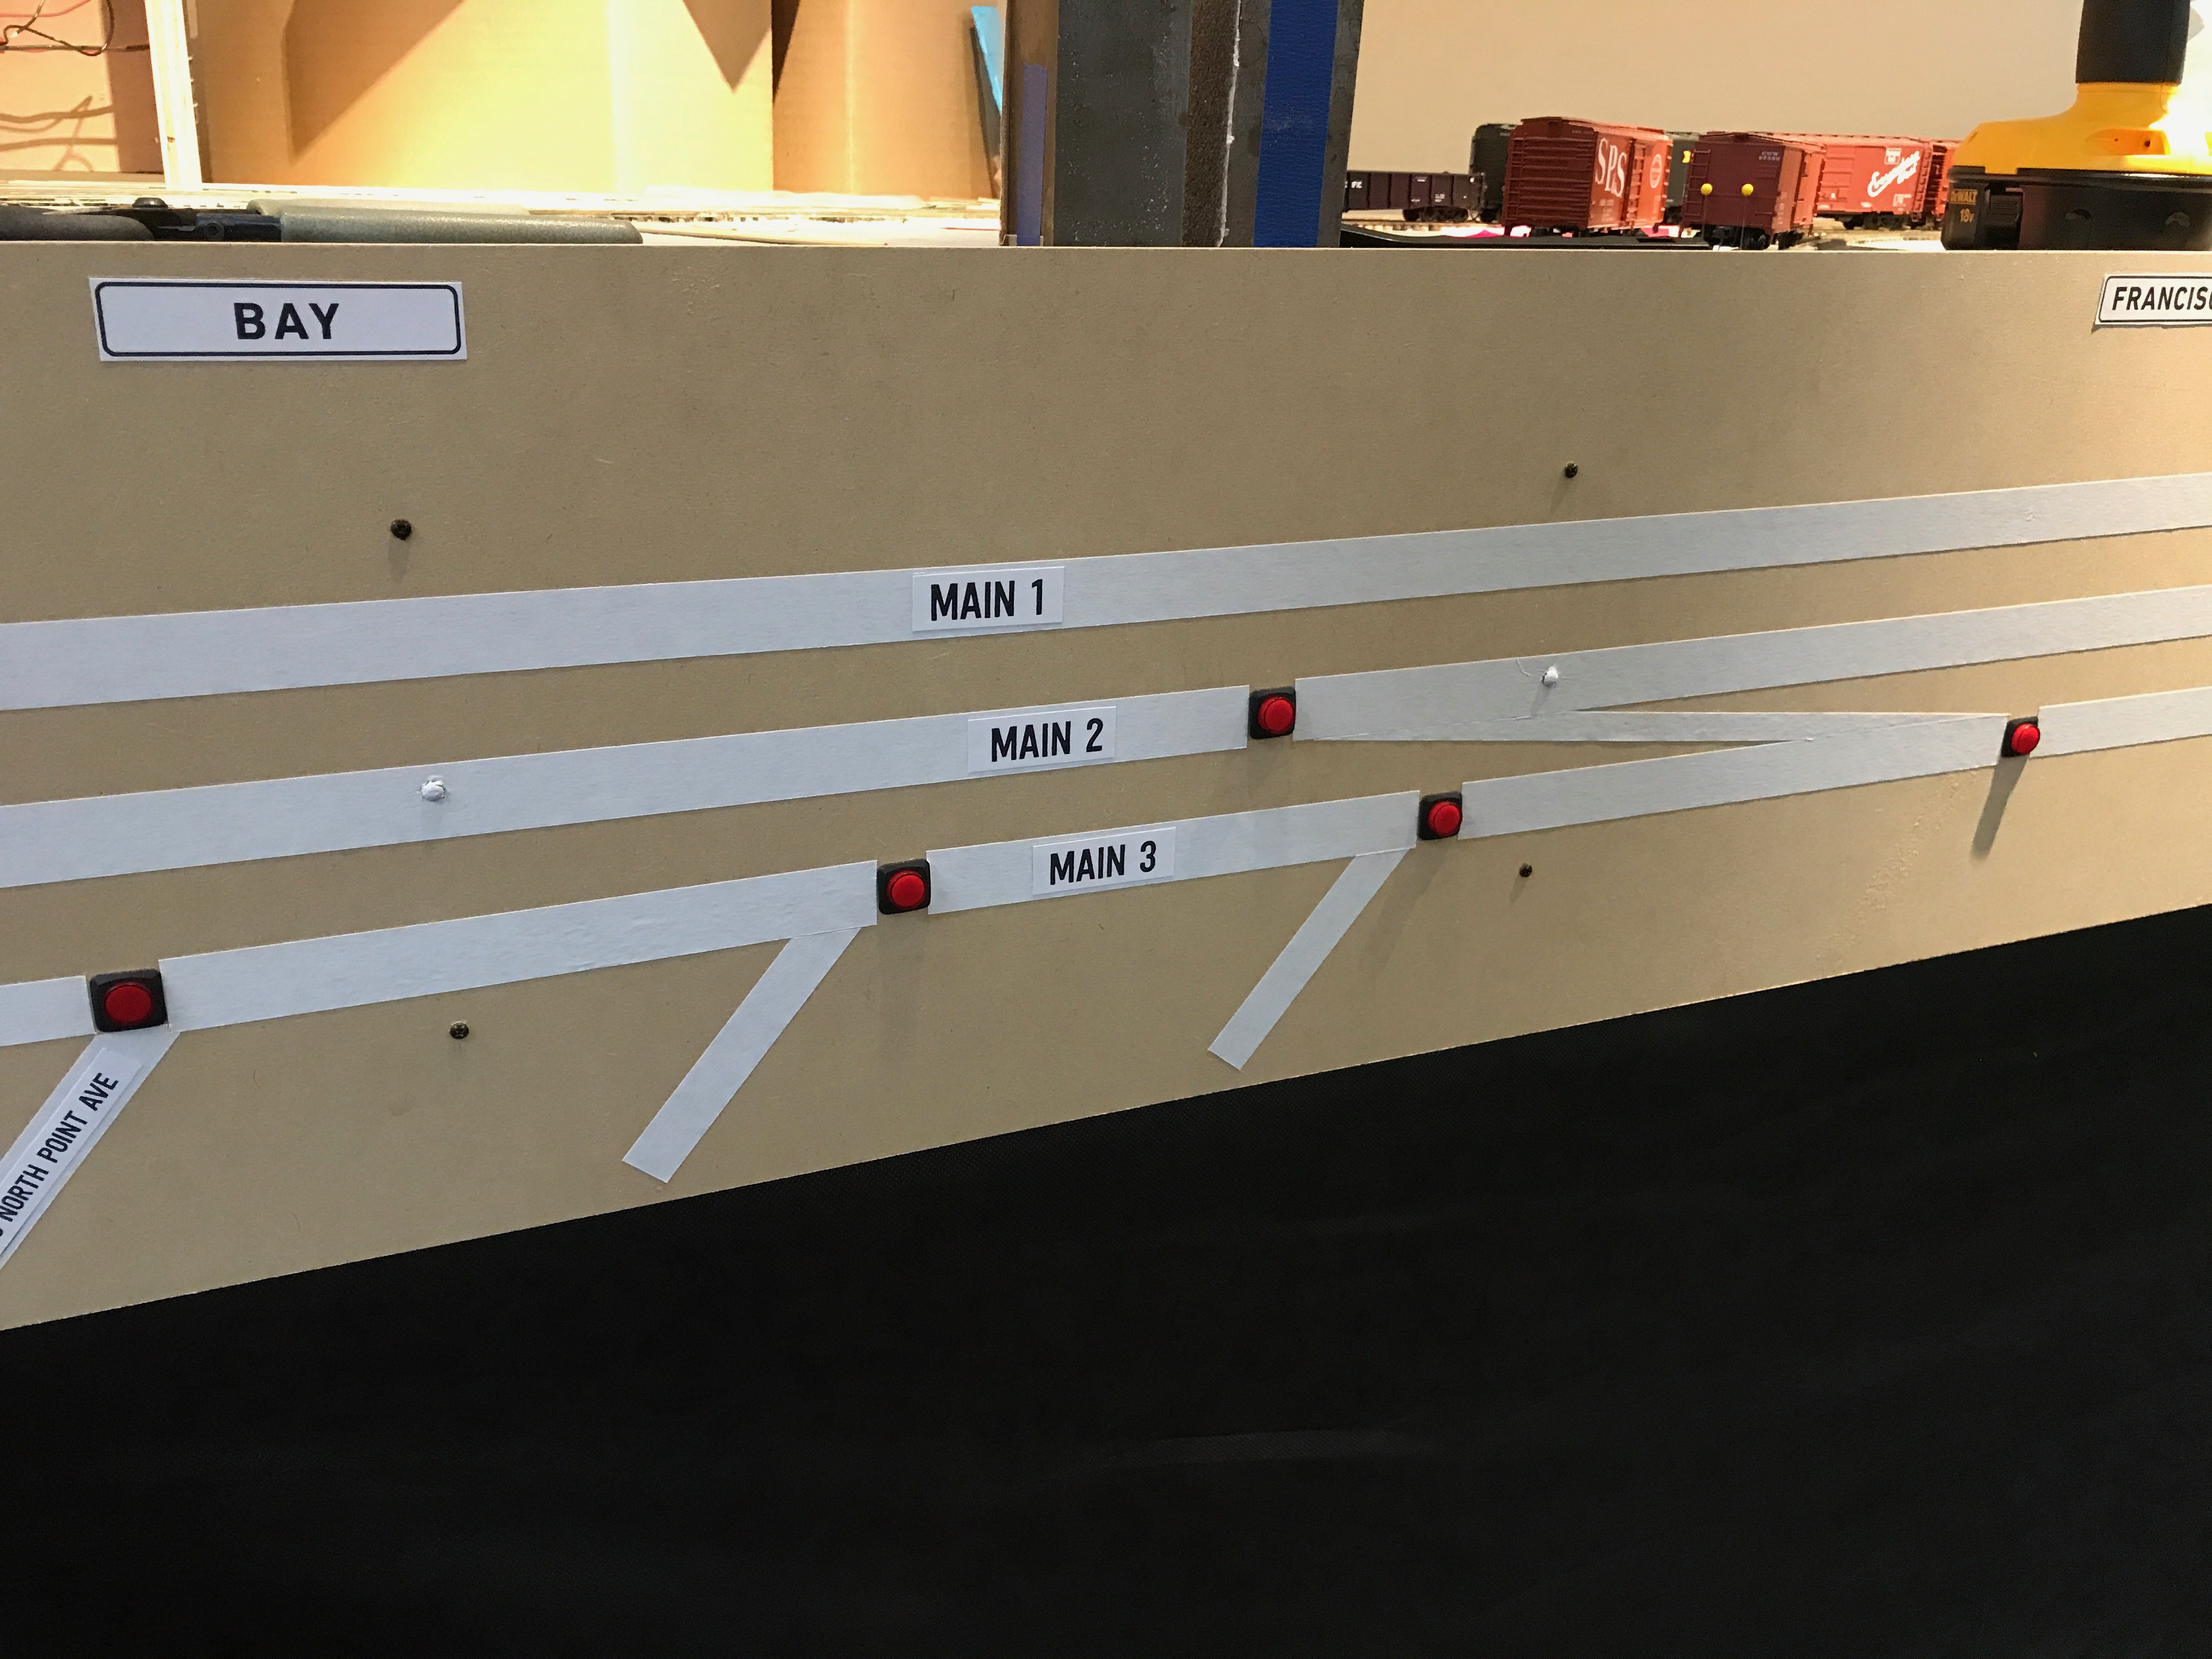
Each turnout button is more or less directly out from the points, making it fairly easy to match the arrangement on the fascia to the trackwork on the layout. The track lines are (for now) artist’s tape of various widths. Someday, I hope to paint on more durable artwork, but this will certainly do for now. This is probably what you’ll see for the next several years.
I’ve also been working on the pavement along North Point. Running tracks in the street are to be buried in pavement, but the spurs where cars can be spotted are laid in with cobblestones. This is DAS air drying clay, with the cobble stones rolled in using some nifty tools. This still needs some work, since there’s a little too much sinkage at the ties. I’ll write more on this as I get it all figured out.
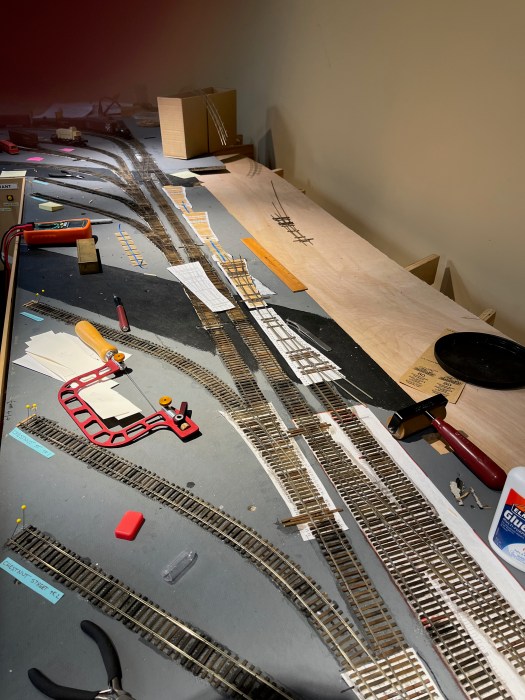
The bulk of the recent tracklaying work is done, with an overview shot here prior to cleanup. Every tool seen here has been used within the last couple of weeks. For the next op sessions, instead of a couple of pieces of flextrack serving as the car float interchange, the crew will be able to make their way over here to North Yard and make a block swap. Eventually, the wharf job crew will be responsible for the car float that will be over here as well.

Below table work needs to be done here yet. This include switch machine installation and track feeder connections to the DCC bus.
I’m also working on some paperwork to help a crew find things. The first one is an Industry List, much like the prototype’s. Look up “Musto Keenan” and you’ll find it listed as “535 North Point / Taylor”. Now that the street signs are on the fascia, it should be easier to find places. I’ll expand the overview map as well.
My goal is to have everything that I like to see when I come to a layout for the first time. Easily readable paperwork that makes it clear what work needs to be done (handled via the B-7’s). Maps showing where things are. Signs for every industry. Signs for major locations.
Other goals to make it nice for the crews include:
- declutter the active portion of the railroad, and the to-be-built-later sections as well. The “later” sections will still have some building mockups, some switch templates down, showing some notion of what is yet to come.
- permanent fascia on all of the parts of the railroad we’ll be operating. I think this makes things look cleaner
- skirting hanging from the fascia, mostly to hide all of the clutter that used to be on top of the layout and which got moved down below
- a central place for snacks & such. Not right in the middle of things, but easy enough to get as needed.
Gandydancing, again
I’ve not been doing much on my own railroad for a while, as I spent a number of weekend work sessions helping to build the benchwork for a layout for a young gentleman (to support the Wishes and More Foundation). That benchwork has been finished, so I’ve been back to my own railroad.
The next section to be built is the area up near Fisherman’s Wharf. This includes Pier 43 (the car float connection to the AT&SF, WP and NWP), North Yard, and a small handful of industry locations (Standard Oil, Del Monte, Cincotta Bros), and the connecting track to Fort Mason.
Towards the top of the picture, one track (#2) currently rounds the corner and will shortly connect to the tracks already in operation. #1 track will soon parallel #2. On the right side are the four tracks of North Yard, varying wildly in size. Track capacities are 7 cars, 6, 4 and 3 cars. Such is what fits into the city block grid.
On the left side of this picture will be Pier 43 (the car float) and Pier 43 ½ (additional tracks to support swapping blocks of cars on and off the float).
In this area, new construction consists of a single left-hand crossover, 4 left hand switches, and the longest single piece of straight track that exists on the railroad (about 4 feet). Add in some other yard tracks of short lengths.
